So, how are you doing in preparation for Christmas? Are you remembering to keep the reason for the season in mind?
Sometimes, it's too easy to get caught up in the popular "Santa" christmas.
Around here, the Advent banners that our quilt group made for church are going up, one more each week, and they look marvelous.
At home, the tree is up. Unfortunately, the cat has an interest in the tree - particularly in climbing INTO the tree. Today my poor doggie got the fright of her life as she walked past the tree and got ambushed by the cat. Now the dog is afraid of the tree !
The shopping is just about done. You know Murphy's law? The one that bites you when you least expect/need it? Well it was in full force here this week.
I succumbed to the pressure and ordered a new cell phone for my son for Christmas. His iPhone was 3 years old and the contract was finished, so it was a good time to trade up. The phone arrived, and is carefully stashed. I even found a buyer for the old phone (a friend). Then Friday, he dropped his phone. He's done this before and it always survived just fine. This time, it didn't. It dinged the top right corner and cracked the screen - about a full square inch in that corner. My heart sank.
You see, my son is a very "fussy" kid. He wouldn't even use a case or screen saver on his phone because it changed the texture enough to bug him. Normally, he'd freak out at this kind of accident. But he didn't. That worries me. Does he know???????
He just grumbled a bit, then said how now he had to get a new phone because this one was too old and slow anyway. I offered solutions to repair it, all of which he denied, saying he was surprised this hadn't happened sooner and how it was ok, because it still worked even with the cracked screen.
Then I had to tell my friend that the phone was broken. I called around town and the cheapest repair shop wanted $39 to fix it. And that was with an appointment, and he needed for 24 hours. Well, that was out because how was I going to get his phone away for 24 hours and not spill the secret that he was getting a new one?
So, my friend still agreed to buy the phone for the price we had agreed on, less the $40 it was going to cost him to fix it.
Today, I stopped at the dollar store and bought him a new charger cord for his phone that he's been asking for. I hope that throws him off until Christmas.
Oh, and when I ordered his new phone, I also bought one for ME !!! Woohoo :)
Sunday, December 14, 2014


Sunday, November 30, 2014
Feeling blue
Today, I spent the day in bed. That means, between doing laundry, cooking meals, letting the dog out, reminding (several times of course) my son to do his delegated chore of the day (cleaning out the van) and other things.
To survive, I used a timer. Put the laundry in, set the timer, go back to bed. When the timer rings, get up and put in another load. Set the timer and go back to bed etc.
Why am I in bed?
Feeling yucky.
I've been burning the candle at both ends for the last few weeks and I think my body is just telling me to "stop!"
It's a good thing my son is a teen now. He can be independent- at least when he wants to. I remember these days when he was a toddler - I would just lay on the floor in the middle of the family room and let him just crawl all over me. That way he was safe, and I could rest. That was back when I spent half my life on night shift. I don't miss those days at all.
So, I've not accomplished a thing today. Yesterday I finished a customer quilt and started pinning the next one. It's just going to have to wait for a couple of days now.
So, sniff, cough, that's it for today.
Back to bed.
T
It's a good thing my son is a teen now. He can be independent- at least when he wants to. I remember these days when he was a toddler - I would just lay on the floor in the middle of the family room and let him just crawl all over me. That way he was safe, and I could rest. That was back when I spent half my life on night shift. I don't miss those days at all.
So, I've not accomplished a thing today. Yesterday I finished a customer quilt and started pinning the next one. It's just going to have to wait for a couple of days now.
So, sniff, cough, that's it for today.
Back to bed.
T
Wednesday, November 26, 2014
Why Black Friday isn't such a big thing in Canada even though the retailers are trying.....
Canadians just aren't "into" Black Friday. Ok, maybe a few who live within a reasonable driving distance to a border crossing, but for most of us, it just isn't an event. My opinion is ....
First of all, our Thanksgiving is in October, not November
We don't do mob scenes
We started our Christmas shopping in July
We don't do mob scenes
We aren't as impressed with "sale" signs until we actually calculate the cost , in Canadian dollars.
We don't do mob scenes
We have to take into account the exchange rate - which right now, well, sucks.
We don't do mob scenes
We have to pay tax and duty at the border, which seriously cuts into the savings.
and, since we don't do mob scenes, we look for off-peak hours to shop - like suppertime at Costco.
Like I said, that's my opinion.
The retailers are trying to make Black Friday a thing here. They are trying. The whole thing lacks credibility though, when the sales start the week before Black Friday - duh.
It's the same with Boxing Day. Now that used to be a sale. You could stock up on anything "Christmassy" and save it for next year. Now the Boxing Day sales start the week before Christmas and last a week, or two, depending on the store.
We've seen it coming. Swimsuits on sale in March. Back to school sales the second week of July, and Snow suits available before August. I don't know how parents with growing kids shop this way - my guy grew in spurts, so I never knew from one month to the next what size he would be. He still does. He's grown 2 inches in his trouser waist size since school started. And the medium sized shirts are starting to look quite short, so, he's on to size large. They hang on him since he's so slim, but he needs the length in the body and sleeves. I don't think he's done yet either. He's taller than me already, and the doctor figured he'd be about 6'4" based on his childhood growth charts. That isn't unusual for our family though, we are all tall - my nephews are all well over 6'. Let's not even talk about shoe size !
On the quilting scene, our church group finished the Advent banners last night. YAY!! It was a much larger project than anyone thought. If we do a banner again, it will be 1 piece, and with a lot more notice. Finishing a 5 panel banner in less than a month was hard.
It's also a good thing it's done because my customers are starting to hand in their projects for quilting. In the last week, I've received 5. That's great in my book, that part of quilting is fun for me. Add to that the bonus of being paid, and it's all good.
By the way, is anyone out there looking for a used Handiquilter? Our local rep is moving with her family to PEI, and has her rig for sale.

First of all, our Thanksgiving is in October, not November
We don't do mob scenes
We started our Christmas shopping in July
We don't do mob scenes
We aren't as impressed with "sale" signs until we actually calculate the cost , in Canadian dollars.
We don't do mob scenes
We have to take into account the exchange rate - which right now, well, sucks.
We don't do mob scenes
We have to pay tax and duty at the border, which seriously cuts into the savings.
and, since we don't do mob scenes, we look for off-peak hours to shop - like suppertime at Costco.
Like I said, that's my opinion.
The retailers are trying to make Black Friday a thing here. They are trying. The whole thing lacks credibility though, when the sales start the week before Black Friday - duh.
It's the same with Boxing Day. Now that used to be a sale. You could stock up on anything "Christmassy" and save it for next year. Now the Boxing Day sales start the week before Christmas and last a week, or two, depending on the store.
We've seen it coming. Swimsuits on sale in March. Back to school sales the second week of July, and Snow suits available before August. I don't know how parents with growing kids shop this way - my guy grew in spurts, so I never knew from one month to the next what size he would be. He still does. He's grown 2 inches in his trouser waist size since school started. And the medium sized shirts are starting to look quite short, so, he's on to size large. They hang on him since he's so slim, but he needs the length in the body and sleeves. I don't think he's done yet either. He's taller than me already, and the doctor figured he'd be about 6'4" based on his childhood growth charts. That isn't unusual for our family though, we are all tall - my nephews are all well over 6'. Let's not even talk about shoe size !
On the quilting scene, our church group finished the Advent banners last night. YAY!! It was a much larger project than anyone thought. If we do a banner again, it will be 1 piece, and with a lot more notice. Finishing a 5 panel banner in less than a month was hard.
It's also a good thing it's done because my customers are starting to hand in their projects for quilting. In the last week, I've received 5. That's great in my book, that part of quilting is fun for me. Add to that the bonus of being paid, and it's all good.
By the way, is anyone out there looking for a used Handiquilter? Our local rep is moving with her family to PEI, and has her rig for sale.
FOR SALE!!!! HQ Fusion with a Pro Stitcher! We are moving out of the province and I am needing to sell my machine. SHARE this post because I have to sell it. Please message me for serious inquiries.
Monday, November 24, 2014
Happy Monday
Well, they say Canadians talk about the weather more than anyone in the world. I'll bet the folks in Buffalo are way past that this week. On behalf of all Canadians, I wish you well. Hang in there.
I spent the afternoon with my sewing buddies in Dorchester today. This is a fun group. We get together to sew, quilt, knit, gab, laugh and basically enjoy each other's company every week. I managed to get the top done for my nephew's "going to college" quilt. Three more nieces and nephews to go before I start on the great nieces and nephew. By then there should be another one as my niece Kristen and her hubby are expecting their first child soon. They just moved into their new to them house on the weekend, so let the nesting begin !! Really, I wish them well. They've already endured some heavy duty stuff in their lives together, so they deserve to have a wonderful time with parenthood. As I say to all new parents - enjoy every minute - even the crazy ones.
I had enough blocks left over from Connor's quilt to make the top for a kid's quilt for our charity. Since the guild provides the batting and backing, I should have it done for next week. I really need to get a new camera- the computer won't recognize my cell phone, and even though it has a pretty good camera, I miss the ability to get creative behind the lens.
On another note, I'm getting together with the Bethel quilters tomorrow afternoon to hopefully FINISH the banners for Advent. I think we all know now to stick to less ambitious projects when time is limited !! It falls under the "live and learn " category.
On a personal note, I spent Sunday afternoon with my Mom. The gravestone for my Dad was installed last week, so we went together to visit. It looked really nice. We all got to see the blueprint for it, but it looks much different - in a good way - in stone. I'm glad they were able to put it in before winter. It has given us all a bit of closure. So far Mom is doing really well. |W|e'll be spending extra time as a family over Christmas this year - it could be a tough time.
So that's it for today. Will check in with you later this week.
Luv
Teresa
I spent the afternoon with my sewing buddies in Dorchester today. This is a fun group. We get together to sew, quilt, knit, gab, laugh and basically enjoy each other's company every week. I managed to get the top done for my nephew's "going to college" quilt. Three more nieces and nephews to go before I start on the great nieces and nephew. By then there should be another one as my niece Kristen and her hubby are expecting their first child soon. They just moved into their new to them house on the weekend, so let the nesting begin !! Really, I wish them well. They've already endured some heavy duty stuff in their lives together, so they deserve to have a wonderful time with parenthood. As I say to all new parents - enjoy every minute - even the crazy ones.
I had enough blocks left over from Connor's quilt to make the top for a kid's quilt for our charity. Since the guild provides the batting and backing, I should have it done for next week. I really need to get a new camera- the computer won't recognize my cell phone, and even though it has a pretty good camera, I miss the ability to get creative behind the lens.
On another note, I'm getting together with the Bethel quilters tomorrow afternoon to hopefully FINISH the banners for Advent. I think we all know now to stick to less ambitious projects when time is limited !! It falls under the "live and learn " category.
On a personal note, I spent Sunday afternoon with my Mom. The gravestone for my Dad was installed last week, so we went together to visit. It looked really nice. We all got to see the blueprint for it, but it looks much different - in a good way - in stone. I'm glad they were able to put it in before winter. It has given us all a bit of closure. So far Mom is doing really well. |W|e'll be spending extra time as a family over Christmas this year - it could be a tough time.
So that's it for today. Will check in with you later this week.
Luv
Teresa
Monday, November 17, 2014
Have you watched Quilty lately?
I like watching Quilty. Mary Fons, yes the daughter of Marianne Fons of Fons and Porter has been making episodes of Quilty again.
I love her "querky" "quilty" persona. She's funny, smart, and easy to follow. Her videos cover everything from the very basics for beginners to how to put difficult blocks together. Along the way, she drops hints and tips and ideas from viewers.
You can find her videos on youTube ---- search Quilty.
There's only one problem, once I start watching, hours go by. Seriously, I don't know where they go.
Teresa
I love her "querky" "quilty" persona. She's funny, smart, and easy to follow. Her videos cover everything from the very basics for beginners to how to put difficult blocks together. Along the way, she drops hints and tips and ideas from viewers.
You can find her videos on youTube ---- search Quilty.
There's only one problem, once I start watching, hours go by. Seriously, I don't know where they go.
Teresa
Sunday, November 16, 2014
Hello again
Wow. I just checked in and can't believe it's been so long since my last post. I guess life got away from me again
My darling son is now in high school. It seems like yesterday I held him in my arms for the first time. That wouldn't be easy now - he's taller than me and has a bigger shoe size!
My family has had a few ups and downs over the last 2 years. My sister fought a battle with breast cancer and won !!
This summer my father passed away after a long battle with heart disease. I miss him, but I know he is in a better place and no longer suffering.
Other events have kept us hopping, but somehow, I have made time for some sewing and quilting.
This quilt that is my banner now, is finally finished. It took me over 2 years to complete. I worked on it off and on, since the piecework was tedious. Each 5" square has 25 pieces. That's over 4,750 pieces just in the blocks! I changed the border from the pattern as I wanted a simpler view. So now that it's finished, I've renamed it "Stars over Ireland."
I've already completed a couple more quilts since that, the most recent being a queen sized falling charms from the Missouri Star Quilt Company video on youTube. I love their videos, and Jenny, the hostess is a hoot!
My next major quilt I want to make is the most recent block of the month by Eleanor Burns. I'm not sure of the name, but you can check it out here.
https://www.youtube.com/watch?v=E1YVkVZ4tPM
She has the video tutorials all posted. Look for the "case of the missing quilt" series. It's lots of fun and there are some really special guests on the videos.
I'm also teaching again. We've started up a quilting group in our church. There are about 10 ladies who come out twice a month. There is a real spectrum of talent, from the raw beginner, to accomplished garment sewers, to experienced quilters. It makes for a challenging group.
Right now we've put our block of the month on hold to make new banners for the church for the season of Advent. We're making a series of 5 panels, each 18"x60" depicting one of the advent candles. We're using raw edge applique. They're starting to look good ! I'll try to post some pictures once they're completed.
The block of the month we're working on is a sampler wall quilt/table topper. The center is a pieced wreath about 18" square made of squares and half square triangles The border of that has appliqued flower boughs. That is framed with a 1" border. The next border is made of 6" squares of all different blocks. We started with a snowball block, then a 9 patch, then did a disappearing 9 patch, friendship star, dutchmans puzzle, jacobs ladder, ohio star, , square in a square etc. Each block building on the skills of the previous one.
It became clear along the way, that we as quilters are too hard on ourselves. When I see someone obsessing over one clipped point out of 26 or so, I really feel the need to say "relax ! " or as Eleanor Burns says - hang it high and keep it moving! The only one who will see it is you, so go easier on yourself. Do you think Rembrandt redid a painting because a brushstroke was off?
Anyway, I am going to revive this blog. So if you're still out there, sent me a line.d
Teresa
My darling son is now in high school. It seems like yesterday I held him in my arms for the first time. That wouldn't be easy now - he's taller than me and has a bigger shoe size!
My family has had a few ups and downs over the last 2 years. My sister fought a battle with breast cancer and won !!
This summer my father passed away after a long battle with heart disease. I miss him, but I know he is in a better place and no longer suffering.
Other events have kept us hopping, but somehow, I have made time for some sewing and quilting.
This quilt that is my banner now, is finally finished. It took me over 2 years to complete. I worked on it off and on, since the piecework was tedious. Each 5" square has 25 pieces. That's over 4,750 pieces just in the blocks! I changed the border from the pattern as I wanted a simpler view. So now that it's finished, I've renamed it "Stars over Ireland."
I've already completed a couple more quilts since that, the most recent being a queen sized falling charms from the Missouri Star Quilt Company video on youTube. I love their videos, and Jenny, the hostess is a hoot!
My next major quilt I want to make is the most recent block of the month by Eleanor Burns. I'm not sure of the name, but you can check it out here.
https://www.youtube.com/watch?v=E1YVkVZ4tPM
She has the video tutorials all posted. Look for the "case of the missing quilt" series. It's lots of fun and there are some really special guests on the videos.
I'm also teaching again. We've started up a quilting group in our church. There are about 10 ladies who come out twice a month. There is a real spectrum of talent, from the raw beginner, to accomplished garment sewers, to experienced quilters. It makes for a challenging group.
Right now we've put our block of the month on hold to make new banners for the church for the season of Advent. We're making a series of 5 panels, each 18"x60" depicting one of the advent candles. We're using raw edge applique. They're starting to look good ! I'll try to post some pictures once they're completed.
The block of the month we're working on is a sampler wall quilt/table topper. The center is a pieced wreath about 18" square made of squares and half square triangles The border of that has appliqued flower boughs. That is framed with a 1" border. The next border is made of 6" squares of all different blocks. We started with a snowball block, then a 9 patch, then did a disappearing 9 patch, friendship star, dutchmans puzzle, jacobs ladder, ohio star, , square in a square etc. Each block building on the skills of the previous one.
It became clear along the way, that we as quilters are too hard on ourselves. When I see someone obsessing over one clipped point out of 26 or so, I really feel the need to say "relax ! " or as Eleanor Burns says - hang it high and keep it moving! The only one who will see it is you, so go easier on yourself. Do you think Rembrandt redid a painting because a brushstroke was off?
Anyway, I am going to revive this blog. So if you're still out there, sent me a line.d
Teresa
Sunday, September 22, 2013
No longer Missing in Action
Wow. I didn't realize how much time had gone since my last post. I guess I kind of missed the summer! We did have a good summer with camping, day tripping, lazy days and my son had friends over for a week at a time - which is great because it keeps him from getting bored.
I've been busy crafting. My son's school has a fall fest bazaar coming up the beginning of October. I have a table booked for selling my crafts. So, here's the short list:
My Highlands quilt If someone is willing to pay the price I want for it, I'll sell it.
Several sock monkeys
Some tabletop place card holders - for parties, or wine and cheese etc - holds the id cards Made from black binder clips painted with glitter nail polish and a gold braid tied around the "tabs" = cute.
Teddy bears - made of wash cloths with googly eyes :)
silver wire "viking weave" bracelets.
An apron or two
A dozen quilted, and appliqued table runners - most with a Christmas theme
Many winter themed quilted potholders
Some desk caddies for post it notes made out of dollar store photo frames.
and best of all
Bottlecap necklaces for young and old.
In preparation, I made a quilt stand to put up against the wall behind my table. Cut one 12' 1 1/2" PVC pipe into two equal halves.
2 pieces of 2 1/2" PVC pipe approx 24" long.
Take one wooden dowel, *I used a staircase ballister* cut in half
One piece of 16"x36" MDF board cut into to squares. Mark the middle.
Two large "eye" bolts.
One curtain rod
Drill a pilot hole through the middle of the boards. Use a larger bit to open the first part more so the screw will sink flush with the board. Drill a pilot hole in the middle of the end of each wooden dowel
Screw the board to the end of the dowel X2
Slide the 2 1/2" PVC over the dowel. Drill a pilot hole through the side into the side of the dowel and screw it together so the pipe won't slip off.
Now slide the long 1 1/2" PVC pipe into the larger pipe allowing the end to slide over the dowel inside the larger pipe. This supports the upright pipes.
Slide the eye bolts onto the curtain rod. Place it across the top of the upright posts just slipping the end of the eye bolts into the top of the pipes. BINGO.
I'll take some pictures at the show so I have something to post soon.
This is the first time I'm having a craft table solo, so I hope it's a success.
AND
I have a Square for my smart phone.
Have you heard about "Square?"
It's a method for smaller businesses to be able to accept credit cards. The Square is about 1"x1" and plugs into the earphone jack of your smartphone. You can swipe M/C or VIsa and it deposits the cash into your designated bank account the next day. Your clients just sign your phone with a stylus that you can buy at a dollar store or a office supply - made for use on tablets or smart phones.
AND one of the best news stories this week was that the Square company is setting up offices in Kitchener Waterloo Ontario. This is the good news that kind of buffers the nasty news of how Blackberry is laying off 40% of their staff in the same city.
So, wish me luck.
T
I've been busy crafting. My son's school has a fall fest bazaar coming up the beginning of October. I have a table booked for selling my crafts. So, here's the short list:
My Highlands quilt If someone is willing to pay the price I want for it, I'll sell it.
Several sock monkeys
Some tabletop place card holders - for parties, or wine and cheese etc - holds the id cards Made from black binder clips painted with glitter nail polish and a gold braid tied around the "tabs" = cute.
Teddy bears - made of wash cloths with googly eyes :)
silver wire "viking weave" bracelets.
An apron or two
A dozen quilted, and appliqued table runners - most with a Christmas theme
Many winter themed quilted potholders
Some desk caddies for post it notes made out of dollar store photo frames.
and best of all
Bottlecap necklaces for young and old.
In preparation, I made a quilt stand to put up against the wall behind my table. Cut one 12' 1 1/2" PVC pipe into two equal halves.
2 pieces of 2 1/2" PVC pipe approx 24" long.
Take one wooden dowel, *I used a staircase ballister* cut in half
One piece of 16"x36" MDF board cut into to squares. Mark the middle.
Two large "eye" bolts.
One curtain rod
Drill a pilot hole through the middle of the boards. Use a larger bit to open the first part more so the screw will sink flush with the board. Drill a pilot hole in the middle of the end of each wooden dowel
Screw the board to the end of the dowel X2
Slide the 2 1/2" PVC over the dowel. Drill a pilot hole through the side into the side of the dowel and screw it together so the pipe won't slip off.
Now slide the long 1 1/2" PVC pipe into the larger pipe allowing the end to slide over the dowel inside the larger pipe. This supports the upright pipes.
Slide the eye bolts onto the curtain rod. Place it across the top of the upright posts just slipping the end of the eye bolts into the top of the pipes. BINGO.
I'll take some pictures at the show so I have something to post soon.
This is the first time I'm having a craft table solo, so I hope it's a success.
AND
I have a Square for my smart phone.
Have you heard about "Square?"
It's a method for smaller businesses to be able to accept credit cards. The Square is about 1"x1" and plugs into the earphone jack of your smartphone. You can swipe M/C or VIsa and it deposits the cash into your designated bank account the next day. Your clients just sign your phone with a stylus that you can buy at a dollar store or a office supply - made for use on tablets or smart phones.
AND one of the best news stories this week was that the Square company is setting up offices in Kitchener Waterloo Ontario. This is the good news that kind of buffers the nasty news of how Blackberry is laying off 40% of their staff in the same city.
So, wish me luck.
T
Saturday, June 22, 2013
Muscular Dystrophy Association - Raffle quilt
I have a niece who has Muscular Dystrophy. That alone makes doing volunteer work with the association meaningful.
Recently, I volunteered to design and make a quilt to be raffled as a fundraiser for the London Chapter of the Muscular Dystrophy Association of Canada.
It took a couple of months to come up with the design. The colours of the association are red and black. The logo for the MDA is 3 connected puzzle pieces. So including that into the theme, here is the result. The quilt is named "Solving the puzzle of Muscular Dystrophy."
The draw date is Dec 4, 2013. Tickets are $5 each or 5/$20. Tickets are available from me or any chapter member.
The photo at the head of the blog is this quilt.
Happy Summer!
T.
Recently, I volunteered to design and make a quilt to be raffled as a fundraiser for the London Chapter of the Muscular Dystrophy Association of Canada.
It took a couple of months to come up with the design. The colours of the association are red and black. The logo for the MDA is 3 connected puzzle pieces. So including that into the theme, here is the result. The quilt is named "Solving the puzzle of Muscular Dystrophy."
The draw date is Dec 4, 2013. Tickets are $5 each or 5/$20. Tickets are available from me or any chapter member.
The photo at the head of the blog is this quilt.
Happy Summer!
T.
Thursday, March 21, 2013
Ok, so I do make rookie mistakes, but that's ok right?
When I saw this pattern, all kitted up and ready, with a life sized example in the store to drool over, I HAD TO HAVE it. So home it came, and I've been waiting for other projects to fall off the radar before opening it because I knew that when I started, I'd have to keep at it until I had it done.

I thought I had it all under control.
I spent nearly a day just cutting fabric.
I couldn't wait to start making those pieces dance.
The first 8 blocks came together rather nicely.
They measure 12.5 " square

The second 7 blocks came together well too.

So, by the time I moved on to the pieced sashing blocks, I guess I was getting a bit overconfident. Remember the first two blocks were 12.5" square?
Well, these sashing blocks are supposed to be 12.5" long.

Unfortunately, mine weren't.
Not even close.
They were 13.5" long, and nearly .5" too wide.
I didn't notice until I tried to attach the flying geese units to each end. They weren't wide enough.
That's when I realized that all 28 of the units I had made so far were not right.
Needless to say, "I was not amused."
I admit, I lost sleep over this one. I contemplated adding a small border to put between the blocks since they obviously wouldn't be matching up now.
I tried coming up with anything that would "fix" the problem.
I even called the quilt store to see if they had some of the fabric so I could just recut the pieces and start over - they didn't.
So, as much as I hated to admit it. I'd have to pick all 28 of them apart and resew them.
Yes, I had skipped the basic part about CHECKING THE SIZE after making the first block to be sure I HAD IT RIGHT. Yes, I'm yelling, but that's what I do when I make a mistake that I know I should have not made. But, I am human. Sigh.
You see, when I'm making half square triangles by the method of sewing across the squares twice and then cutting them in half along the line, I have to have the needle set at "7" to get the right space between the pencil line and the stitching to get them to come out the right size.
BUT
When I return to sewing that scant 1/4" straight seam, I have to have the needle set at "6".
I didn't.
So, to put this in perspective, look at this picture. The space between these lines of stitching is the difference between the setting of "7" and "6".
Barely the width of a pin.

Unfortunately, when it adds up over this many seams, it adds up.
And it makes a big difference.
So, even when all the points match up perfectly, it can still be wrong.
Dang. (The family friendly edition of what I really said.)

So far, I've spent two days picking and resewing, and I have half of them fixed.
And I'm feeling better about it now because I know it was the right decision.
I'm just really, really glad that I starched the heck out of the fabric before cutting it or those bias edges would have been so fragile. If anything, I've learned that:
1. Measure twice, cut once
2. Read the pattern, especially when it says "proof to .... size"
3. Making a practise block is NEVER a waste of time.
4. Starch is my friend
5. Humble pie is a great learning tool.
I love this pattern. I love the fabric. I am going to love the finish.
And all that picking will be totally worth it.
Monday, March 4, 2013
Embroidery Birds
This winter has been really goofy so far. I usually have mood problems when the season turns gray, but this year has been awful. Dreary wet days with no snow on the ground and just cold mud are not my favorite. I don't mind if it's cold, but I love the snow. It brightens up the world.
On that note, my quilting passion is on a slow note right now, so I've turned to some embroidery to feed my craft hunger.
I'm not a fan of redwork, and cross-stitch I wasn't in the mood for, so I picked up some crewel work. I just copied photos from the internet, enlarged them on the printer, outlined the main parts with a sharpie and then traced them onto cotton chambray. The soft blue fabric makes an excellent background as it can be sky or water.
Once the patterns was traced, I fused a light weight interfacing to the back of the fabric. This not only gives the fabric more substance, but helps to hide the threads from the back of the design.
Once the embroidery was done and pressed, I made the backing from fabric fused with heavy interfacing and used scraps of quilt batting in between. Then I bound the edges just like a quilt and added a hanging sleeve. They brighten my day!


 My mom is celebrating her 77th birthday tomorrow and she's a bird lover too. Maybe I'll just wrap them up!
So, what have you been working on?
On that note, my quilting passion is on a slow note right now, so I've turned to some embroidery to feed my craft hunger.
I'm not a fan of redwork, and cross-stitch I wasn't in the mood for, so I picked up some crewel work. I just copied photos from the internet, enlarged them on the printer, outlined the main parts with a sharpie and then traced them onto cotton chambray. The soft blue fabric makes an excellent background as it can be sky or water.
Once the patterns was traced, I fused a light weight interfacing to the back of the fabric. This not only gives the fabric more substance, but helps to hide the threads from the back of the design.
Once the embroidery was done and pressed, I made the backing from fabric fused with heavy interfacing and used scraps of quilt batting in between. Then I bound the edges just like a quilt and added a hanging sleeve. They brighten my day!


So, what have you been working on?
Saturday, February 2, 2013
A bit of saturday fun
I can usually fix small problems on a basic sewing machine. Several times I've rescued a machine destined for the garbage just by giving it some loving care - cleaning , oiling, tension adjustment etc..
This one I picked up on Freecycle was beyond my ability. It was a cheap, off brand plastic "special" so I had nothing invested in it. It ran, but wouldn't stitch so I think the timing was fubar"ed". I started just taking it apart for fun. My son, seeing this, asked if he could do it. Sure!!
So after loosening a bowlful of screws, taking umpteen greasy gears apart and destroying just a couple of plastic parts to get the switches out, we had this:


This one I picked up on Freecycle was beyond my ability. It was a cheap, off brand plastic "special" so I had nothing invested in it. It ran, but wouldn't stitch so I think the timing was fubar"ed". I started just taking it apart for fun. My son, seeing this, asked if he could do it. Sure!!
So after loosening a bowlful of screws, taking umpteen greasy gears apart and destroying just a couple of plastic parts to get the switches out, we had this:

When all was said and done, we tossed a bag full of gears and all the screws in a bag, and kept the motor. That will come in handy for a future science project, yet to be named. The motor works, has 2 speeds, and a light on a separate switch. Science will never be so much fun, :)

Sunday, January 27, 2013
January 2013 FNSI
Yay!! FNSI is back. This week I was working on a client's quilt - trying to get t finished for Saturday delivery. I've been waiting all week for the local sewing store to get the right color (#155) of Superior's Masterpiece thread. I really like this thread for piecing as it's strong yet thin. The gray color of #155 is a chameleon. It blends in and disappears on many, many fabrics. It's also the perfect bobbin thread. Of course I ran out with about 3 bobbins to go :(. Finally I called around and found a spool at a LQS about 30 miles away. Of course today, the first store called that their order had come in. No problem, there was only one available at the other shop, so, I've reserved 2 for me to pick up on Monday. Did I say I like this thread??
Anyway, this quilt was a beautiful dark batik, with a pieced star appliqued as a center medallion. The border was made of alternating tall tumbler shapes of the batik and the star fabric.
To accentuate the star, I used embroidery thread for the quiilting. I took 3 shades of the green and ran them all through the machine together and through the needle. That made for a nice thick thread that really showed up nicely. The three colors made it shimmer and brought it to life. I also added the star detailing to the corners. The main part of the quilt was done in a swirl and spikes pattern. I delivered it this afternoon and the customer is very happy. That makes me happy. :)


Anyway, this quilt was a beautiful dark batik, with a pieced star appliqued as a center medallion. The border was made of alternating tall tumbler shapes of the batik and the star fabric.
To accentuate the star, I used embroidery thread for the quiilting. I took 3 shades of the green and ran them all through the machine together and through the needle. That made for a nice thick thread that really showed up nicely. The three colors made it shimmer and brought it to life. I also added the star detailing to the corners. The main part of the quilt was done in a swirl and spikes pattern. I delivered it this afternoon and the customer is very happy. That makes me happy. :)


Monday, December 31, 2012
Hello and Happy New Year
I've missed you! Sorry about the silence lately. Between the hustle and bustle of Christmas preparation and battling the flu - first my son and then me, and dealing with the ailments of ageing parents, the time has flown by.
I hope you had a Happy and Blessed Christmas.
Now that the New Year is upon us, I pray for health, wisdom and patience. Yes, patience.
As my son enters his "tween" years, the hormones are starting. Ahhhhhhhhhhhh. This will be fun.
As he is not an eager student, the homework battles continue, and I've received some good coaching on strategies to ease that struggle. Wish me luck with that!
On the quilty/crafty front, I've been keeping busy. I made 6 more sock monkeys to sell at RedBird Designs. I've continued to develop my hand quilting. I'm working on my second baby quilt - from a "cheater" panel, so I can stitch it up and not worry about the investment. I made a couple of table toppers for gifts.
 I made another box full of doll clothes for the great nieces, which was delightfully received :)
My niece had said that the dolly diapers I made last year were a great hit and could I make more. So, I did. Did you know you can make 2 dozen dolly diapers from 1/2 meter of flannel? I found that out AFTER I cut up 48 diapers. Let's just say I goofed on the math and leave it at that. So I wrapped a dozen into the gift and put the rest in a large envelop to give to my niece. That way she can replace them as they get lost/ripped/given away or whatever. 5 minutes after opening the box, the littlest great niece - age 3 - was diapering her cousin's truck. :)
Oh, I almost forgot. I got a most wonderful gift from my son. A new iron. It's the Black and Decker "Chrome" continuous steam iron. I'm in iron heaven. I guess that makes me domesticated eh? Don't tell my mother.
Today, being New Year's Eve, I'm playing it low key. I took the van in this morning for a brake job, picked up a friend of my son's on the way home to surprise him with a playdate, and I'm doing some stitching with my trusty puppy at my side. Life is good.
I hope you have a happy and prosperous - and quilty - New Year!
I hope you had a Happy and Blessed Christmas.
Now that the New Year is upon us, I pray for health, wisdom and patience. Yes, patience.
As my son enters his "tween" years, the hormones are starting. Ahhhhhhhhhhhh. This will be fun.
As he is not an eager student, the homework battles continue, and I've received some good coaching on strategies to ease that struggle. Wish me luck with that!
On the quilty/crafty front, I've been keeping busy. I made 6 more sock monkeys to sell at RedBird Designs. I've continued to develop my hand quilting. I'm working on my second baby quilt - from a "cheater" panel, so I can stitch it up and not worry about the investment. I made a couple of table toppers for gifts.

My niece had said that the dolly diapers I made last year were a great hit and could I make more. So, I did. Did you know you can make 2 dozen dolly diapers from 1/2 meter of flannel? I found that out AFTER I cut up 48 diapers. Let's just say I goofed on the math and leave it at that. So I wrapped a dozen into the gift and put the rest in a large envelop to give to my niece. That way she can replace them as they get lost/ripped/given away or whatever. 5 minutes after opening the box, the littlest great niece - age 3 - was diapering her cousin's truck. :)
Oh, I almost forgot. I got a most wonderful gift from my son. A new iron. It's the Black and Decker "Chrome" continuous steam iron. I'm in iron heaven. I guess that makes me domesticated eh? Don't tell my mother.
Today, being New Year's Eve, I'm playing it low key. I took the van in this morning for a brake job, picked up a friend of my son's on the way home to surprise him with a playdate, and I'm doing some stitching with my trusty puppy at my side. Life is good.
I hope you have a happy and prosperous - and quilty - New Year!
Saturday, November 17, 2012
FNSI - Monkey business
Last night was FNSI. This amazing sewing evening hosted by Heidi and her sis. So without further ado, Here's my story in photos.


Tuesday, November 6, 2012
Learning hand quilting


Sunday, October 28, 2012
FNSI results.
I really should call it my Friday afternoon, all day Saturday and some Sunday too results. I've been working on the "When you see this" quilt blocks for a while now. I spread them all out at my quilting club meeting on Monday and realized I had quite a bit of catch up to do on the star blocks. Since I need 97 of the checkerboard and 98 of the star blocks, I dedicated this weekend to seeing stars. The 25 pieces in each block finish at a 5" square block. You can just imagine how small those 1 1/4" squares are to work with. For those of you who have followed my blog, you know that I don't usually use such tiny pieces. But this is a great scrap buster of a quilt, so I got going. I finished 20 star blocks this weekend. So that puts me about half way. This may just take me a while. I want to get it further along though before I crack open a new project that I bought a couple of weeks ago. But oh, I so do want to get into that pretty new fabric.
Here's my show and tell for FNSI.


Here's my show and tell for FNSI.


Tuesday, October 23, 2012
Just hanging out and doing a little fixin'
What have you been up to for the last week or so? Me?, Oh, I've been dabbling in this and that. First, I'm finally working on a quilt for a customer. It's an older, "vintage" well loved, and threadworn quilt. She asked if I could repair the missing patches and the binding. It took a bit to collect some fabrics that I could use to fit in with the time period. Thank goodness for the Goodwill thrift store = we have a clearance center here in town, so after a few trips and about $5, I had a fair collection. The patches that I need to replace are similar to the pieces in a double wedding ring pattern, but they are taller and slimmer. So far I've hand stitched 20 into place. I'll be shopping for some binding material next. The quilt is a tomato-ey red, so hopefully I can find something suitable.
Then there was the laptop thing. Against my better judgement, I've been letting my son use it when he has a buddy over so they can both have a computer to game on. It's been getting a bit of abuse. Then last week, I tripped over the AC cord. I've done this before on another laptop and what happened is it broke the inside part that the plug goes into. My IT guy said it would probably be about a $100 fix. Since the budget is not going to let that happen soon, I did without it for the better part of the week.
Then desperation struck. So, Sunday afternoon, I turned it over and after taking out about 15 screws, the hard drive and another panel, I got the base off. After locating the offensive little part, I found it was not broken, but the metal leaf spring inside had been pushed in. I got out my trusty pink screwdriver. It has several retractable bits, and one is a small punch. It was the perfect size to fit into a little hole and push that spring back into place. I reassembled the thing in reverse order and felt really good about the fact that I did not have any leftover parts. With my fingers crossed, I plugged her in.
IT WORKS !! YAY !! I guess I'll get to use that $100 for bills after all.
Today was our weekly sewing club with the Dorchester Seniors. We had planned to do a Jelly roll race and today was the day. After some good laughs, and a few threats of sabotage, the timingk"judge" said "GO."
The race was fast and furious. There was minimal conversation. The competition was tough. And 45 minutes later - I was done :) I won first prize. My student finished in 60 minutes and won 2nd prize. I am so proud of her!
I won a kit to make a Christmas Santa. I can't wait to start it - stay tuned.
Then there was the laptop thing. Against my better judgement, I've been letting my son use it when he has a buddy over so they can both have a computer to game on. It's been getting a bit of abuse. Then last week, I tripped over the AC cord. I've done this before on another laptop and what happened is it broke the inside part that the plug goes into. My IT guy said it would probably be about a $100 fix. Since the budget is not going to let that happen soon, I did without it for the better part of the week.
Then desperation struck. So, Sunday afternoon, I turned it over and after taking out about 15 screws, the hard drive and another panel, I got the base off. After locating the offensive little part, I found it was not broken, but the metal leaf spring inside had been pushed in. I got out my trusty pink screwdriver. It has several retractable bits, and one is a small punch. It was the perfect size to fit into a little hole and push that spring back into place. I reassembled the thing in reverse order and felt really good about the fact that I did not have any leftover parts. With my fingers crossed, I plugged her in.
IT WORKS !! YAY !! I guess I'll get to use that $100 for bills after all.
Today was our weekly sewing club with the Dorchester Seniors. We had planned to do a Jelly roll race and today was the day. After some good laughs, and a few threats of sabotage, the timingk"judge" said "GO."
The race was fast and furious. There was minimal conversation. The competition was tough. And 45 minutes later - I was done :) I won first prize. My student finished in 60 minutes and won 2nd prize. I am so proud of her!
I won a kit to make a Christmas Santa. I can't wait to start it - stay tuned.
Tuesday, October 16, 2012
Janome Jem Platinum 720
I stopped by my Janome dealership today because I saw a sign advertising Janome Quilting Machines for $200 off. Always on the lookout for bargains, and anything quilty, I had to investigate.
I hadn't read any buzz about a new quilting machine so I was intrigued.
Enter the Janome Jem Platinum 720
At first, she looks small. But then, that's a bonus in a take to class or on the road machine. But she's not a lightweight. She's got metal parts inside, and a lot of bling for your buck.
First of all there is the sleek styling that I've come to expect from Janome. This model is computerized, has 20 stitches and several feet including the 1/4" foot, the walking foot and the open toe darning/quilting foot, among others. The machine has a detachable bed for use freearm. The feed dogs do go down for quilting. It has the needle down button, as well as a start/stop button should you prefer not to use the foot control.
What caught my attention were the stitch selections for quilting. There are two "hand quilting" stitches, short and long where the machine triple stitches one stitch, moves ahead one stitch leaving a single thread and does the triple stitch again. The result is the look of hand stitching. If you have matching thread to your quilt top, you won't even see the single stitch in the middle.
For the lovers of applique, there are some nice touches. There is the blanket stitch, one in each direction - left or right, and there is a baby blanket stitch which is so tiny and cute!
It has the usual assortment of zig zag, blind hem, serger stitch etc that Janome is known for. It also has that great speed regulator slider to keep the machine at an even speed for those of us who hit the pedal to the metal.
Oh, and the price?? It retails for $899.00 Can but is on sale at the Sewing Superstore, London for $699.00 Can until next weekend.
If you want to see this little "Jem" (pun intended), head over and take her for a test drive. This shop also offers layaway plans - can you say Christmas anyone?
(Note: I am not affiliated with the Janome company or the Sewing Superstore other than being a sewist who loves them. )
I hadn't read any buzz about a new quilting machine so I was intrigued.
Enter the Janome Jem Platinum 720
At first, she looks small. But then, that's a bonus in a take to class or on the road machine. But she's not a lightweight. She's got metal parts inside, and a lot of bling for your buck.
First of all there is the sleek styling that I've come to expect from Janome. This model is computerized, has 20 stitches and several feet including the 1/4" foot, the walking foot and the open toe darning/quilting foot, among others. The machine has a detachable bed for use freearm. The feed dogs do go down for quilting. It has the needle down button, as well as a start/stop button should you prefer not to use the foot control.
What caught my attention were the stitch selections for quilting. There are two "hand quilting" stitches, short and long where the machine triple stitches one stitch, moves ahead one stitch leaving a single thread and does the triple stitch again. The result is the look of hand stitching. If you have matching thread to your quilt top, you won't even see the single stitch in the middle.
For the lovers of applique, there are some nice touches. There is the blanket stitch, one in each direction - left or right, and there is a baby blanket stitch which is so tiny and cute!
It has the usual assortment of zig zag, blind hem, serger stitch etc that Janome is known for. It also has that great speed regulator slider to keep the machine at an even speed for those of us who hit the pedal to the metal.
Oh, and the price?? It retails for $899.00 Can but is on sale at the Sewing Superstore, London for $699.00 Can until next weekend.
If you want to see this little "Jem" (pun intended), head over and take her for a test drive. This shop also offers layaway plans - can you say Christmas anyone?
(Note: I am not affiliated with the Janome company or the Sewing Superstore other than being a sewist who loves them. )
Sunday, October 7, 2012
Tutorial for "FOXY" bag

Front elasticized pockets
Inside elasticized pockets
Inside zippered pocket
Zippered top
Cutting instructions.
You will need 1 yard of fabric for this bag, and one yard of lining. You also need a yard of fusible, medium weight interfacing, and 1 1/2" rectangular "D" ring and a 1 1/2" buckle. You need a 18" - 20" zipper (it will be trimmed to size) and one 6" zipper.
You will need approximately a yard of 1/2" elastic.
If you want your strap of one continuous piece of fabric instead of piecing it to get the right length, use 55" of fabric instead. You will then have enough to make 2 bags.
IT IS WISE TO LABEL EACH PIECE AS YOU CUT IT.
Cut 2 from fabric and 2 from lining - front and back panels 10"x14"
Using a saucer or a glass as a guide, trim the bottom two corners to a curve.
Cut 1 from fabric and 1 from lining - bottom gusset 38"x5"
Cut 2 from fabric - zipper tape extensions 4"x 16"
Cut 1 fabric front pocket 7"x20"
Cut one fabric "string" 1"x 24". Turn right sides together and stitch 1/4" seam along the long edge. Turn right side out and tuck in the ends and tack them down for a neat end.
Cut one fabric strap - 6"x55" ( you can piece 6" wide pieces to get the needed length)
Cut 1 from lining - inside gathered pocket. 12"x16" Fold in half lengthwise, right sides together and stitch the long seam. Turn right side out and press. Stitch a casing along the top edge 1/8" wider than the elastic you are using.
Cut one from lining - inside zipper pocket. - square 8" x 8" Fold in half right sides together and stitch around the 3 open sides leaving a 3" area open for turning. Turn right side out and press. You do not have to stitch the opening closed as this will be topstitched.
Cut one front pocket lining 6"x20"
From medium weight fusible interfacing, cut:
2 pieces 10"x14" for front and back, curve the bottom corners same as the fabric pieces
1 piece 5"x 38" for bottom gusset
1 piece 5"x14" to reinforce bottom gusset center (optional)
1 piece 1 1/2" x 55" for strap
Take all interfacing pieces except the strap and trim 1/4" around each edge. This will prevent the fusible from getting on the iron or ironing board and reduce the bulk in the seam allowances.
Sewing Instructions
Shaping the bottom gusset.
Take the fabric, and the lining piece and lay them on top of each other to cut them both at once.
Fold the strip in half crosswise. From the raw edge measure 10" and mark.
From the top raw corner and the bottom raw corner, mark 1" up the short side.
Using a ruler, connect the top 10" mark to the top 1" mark. Repeat on the bottom.
This will shape the sides of the bag to taper in at the top.


Do the same with the interfacing. Trim the extra 1/4", then fuse it to wrong side of bottom gusset. Set aside.
Take the strap piece and press it in half lengthwise. Open and fuse the strap interfacing to the wrong side along the pressed fold line.


To form the inside zippered pocket.
Take your inside zippered pocket. To add the zipper, align the top edge to the edge of the zipper teeth. Make sure the zipper is right side up, and the bottom end of the tape is slightly inside the pocket edge. Fold any extra tape at the top edge under at a 90 degree angle to leave a neat edge. Topstitch along the zipper tape about 1/8"- 1/4" from the teeth. Use a zipper foot, or if your needle position adjusts, move it all the way over to the left.

1 2


 3
3
To form the inside gathered pocket.
Take the pocket piece and insert elastic in the casing. Place on top of the back lining piece matching the bottom edge. Stitch the bottom edge 1/4" from the bottom so the stitching will be inside the seam allowance.
You will divide this into 3 pockets. Place a pin on the back lining piece at the 2 points where you want the pockets to divide. (I make the center pocket fit my cell phone) Stitch up from the bottom to the top edge -and over the elastic to form the first division. Then pull the elastic taught so the center pocket is gathered well. Pin the other division point and stitch from bottom to over the elastic to form the other side of the center pocket. Now, on each side, pull the elastic taught to gather the rest of the pocket fullness to match the width of the lining piece. stitch across the elastic and the sides to hold in place.
Do this on both sides.
To form the front outside pocket, place the front pocket fabric and the front pocket lining right sides together, matching the top long edge. Stitch a 1/4" seam. Open and press the seam allowance towards the fabric piece.


Fold in half lengthwise and press. You'll see that the fabric will extend over the edge and into the lining side.

To attach the front pocket.
Stitch the elastic down, inside the side seam allowance to anchor it. Pull the elastic taught until it is gathered evenly. I make this rather tight as it tends to loosen as the bag is constructed. Secure the elastic to the other end and trim excess.


Do the lining first for practise. Then do the same thing with the purse fabric. You'll end up with two "bags", one of purse fabric and one of lining.
1. Mark the center of the bottom of both front and back pieces, and the center of the bottom gusset. Taking the front piece, match the center to the center of the gusset, right sides together. I only use one pin at this point. Starting at the center, stitch a 1/2" seam along the bottom, around the curve and up the side. If you hold the gusset in your right hand and the front piece in your left hand you can match them up as you sew. Go slowly around the bottom corner. Now, starting in the center again, stitch the other way, going along the bottom, around the curve and up the side. This time the gusset will be on top.
There is extra allowance on each end of the gusset, so it will stick out even when the front and the back pieces are attached.


Again, the gusset will stick out on both ends.

Attach the back piece in the same manner. You may need to wrestle with it a bit at this stage.
Doing this step with both the lining first, then with the fabric, you will now have 2 bags, a fabric one, and a lining one.
With the fabric bag inside out. With the lining bag right side out. Place the lining inside the bag. Match centers of top edges and centers of bottom gusset where it sticks out the top. Leave a 4" opening along the top edge for turning. Stitch along the top raw edge lining up the raw edges as you go. Use a small stitch length so this is a strong seam. Leave the side gusset pieces open.
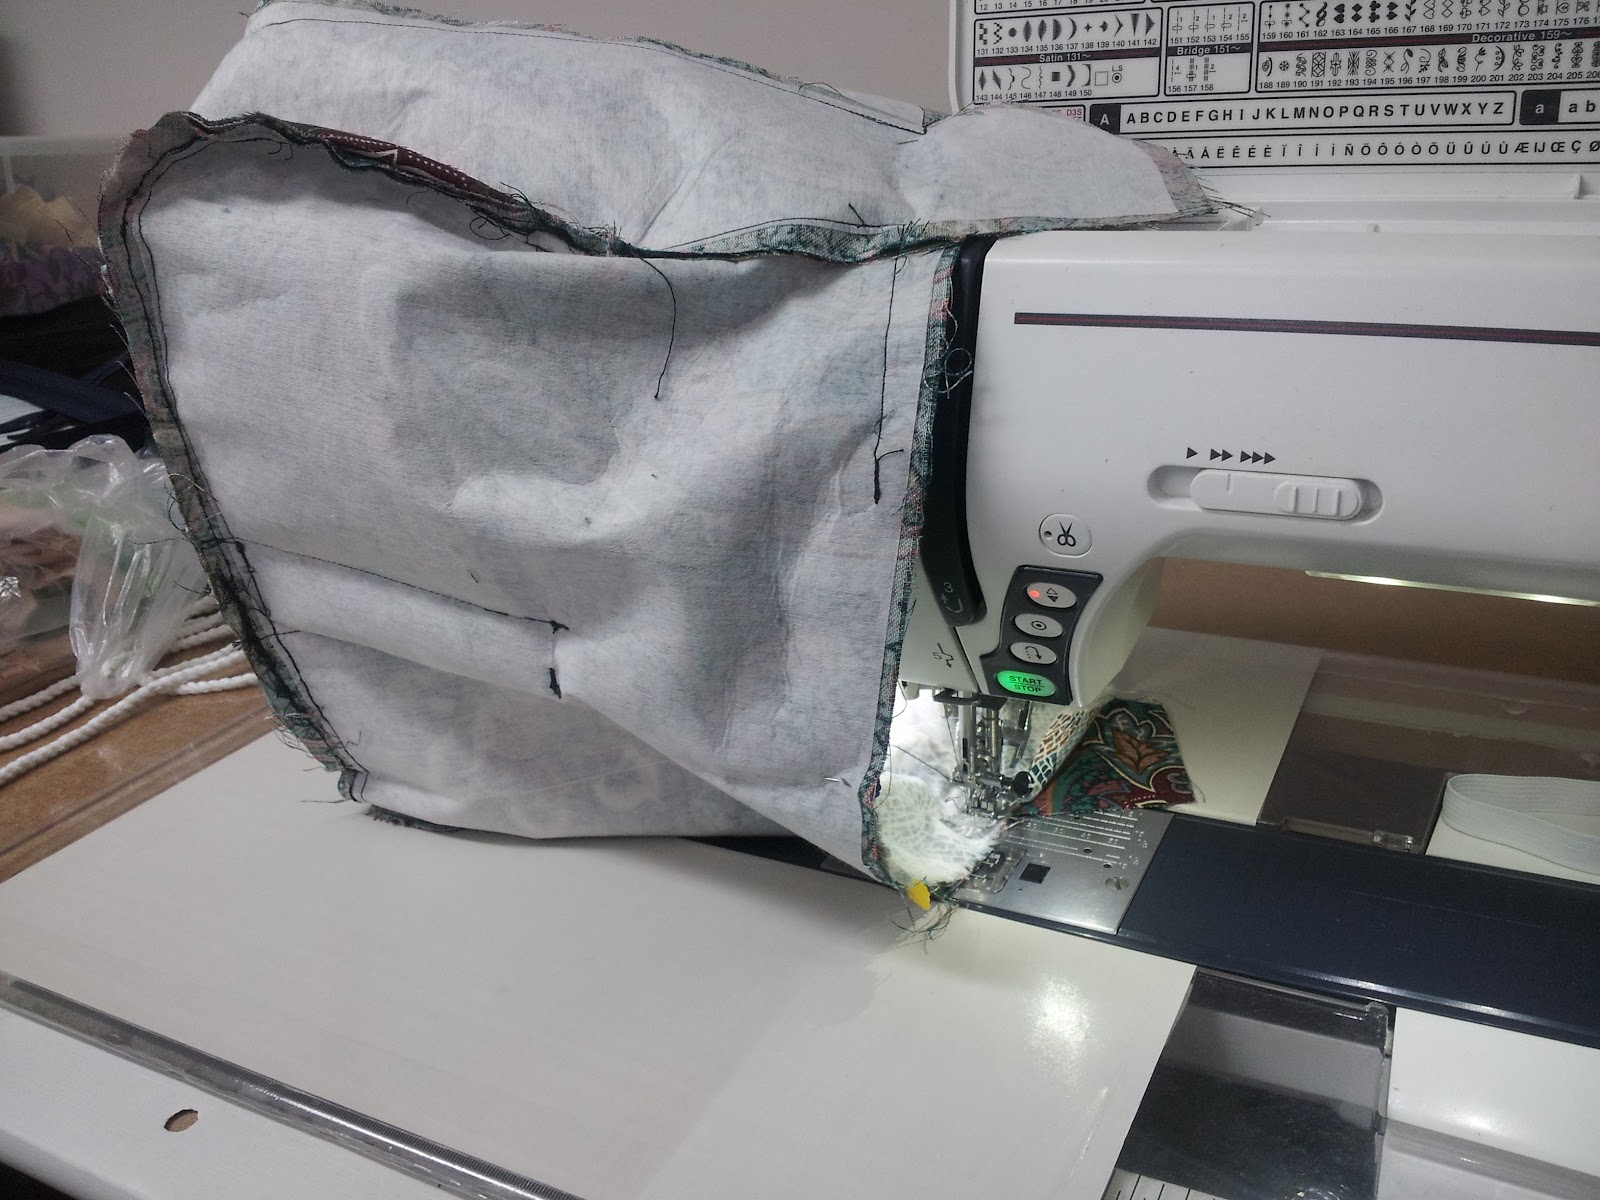


You can stitch across the tab below the ring if you choose, but it is not essential.


But I choose to add a zipper.

Now place the zipper right side DOWN. Carefully trim 1/4" off the one layer of the fabric along both raw edges as shown.


 Fold the end of the zipper into the bag and top stitch across it.


The strap can also be adjusted to wear across the body, or as a shoulder bag.
Subscribe to:
Posts (Atom)