Sunday, October 7, 2012

Tutorial for "FOXY" bag

Features:  Long convertible strap
                 Front elasticized pockets
                 Inside elasticized pockets
                 Inside zippered pocket
                 Zippered top


Cutting instructions.
You will need 1 yard of fabric for this bag, and one yard of lining.  You also need a yard of fusible, medium weight interfacing, and 1 1/2"  rectangular "D" ring and a 1 1/2" buckle.  You need a 18" - 20"  zipper (it will be trimmed to size) and one 6" zipper.
You will need approximately a yard of 1/2" elastic.
If you want your strap of one continuous piece of fabric instead of piecing it to get the right length, use 55" of fabric instead.  You will then have enough to make 2 bags.

IT IS WISE TO LABEL EACH PIECE AS YOU CUT IT.

Cut 2 from fabric and 2 from lining - front and back panels  10"x14"  
Using a saucer or a glass as a guide, trim the bottom two corners to a curve.

Cut 1 from fabric and 1 from lining - bottom gusset  38"x5"  

Cut 2 from fabric - zipper tape extensions 4"x 16"

Cut 1 fabric front pocket   7"x20"

Cut one fabric "string" 1"x 24".  Turn right sides together and stitch 1/4" seam along the long edge.  Turn right side out and tuck in the ends and tack them down for a neat end.

Cut one fabric front band -  you have two choices.  Cut it 2"x16" and fold it in half crosswise, or cut it  4"x 8" and fold it in half lengthwise.  Either way, fold it right sides together and stitch the sides with a 1/4" seam.  If you use the 8" piece, stitch a curve along the one end.  Turn right side out and leave the one end open.

Cut one fabric strap - 6"x55"   ( you can piece 6" wide pieces to get the needed length)

Cut 1 from lining - inside gathered pocket.  12"x16"  Fold in half lengthwise, right sides together and stitch the long seam.  Turn right side out and press.  Stitch a casing along the top edge 1/8" wider than the elastic you are using.

Cut one from lining - inside zipper pocket.    - square   8" x 8"   Fold in half right sides together and stitch around the 3 open sides leaving a 3" area open for turning.  Turn right side out and press.  You do not have to stitch the opening closed as this will be topstitched.

Cut one front pocket lining  6"x20"

From medium weight fusible interfacing, cut:
2 pieces  10"x14" for front and back, curve the bottom corners same as the fabric pieces
1 piece 5"x 38" for bottom gusset
1 piece 5"x14" to reinforce bottom gusset center (optional)
1 piece 1 1/2" x 55" for strap
Take all interfacing pieces except the strap and trim 1/4" around each edge.  This will prevent the fusible from getting on the iron or ironing board and reduce the bulk in the seam allowances.

Sewing Instructions


Shaping the bottom gusset.
Take the fabric, and the lining piece and lay them on top of each other to cut them both at once.
Fold the strip in half crosswise.  From the raw edge measure 10" and mark.
From the top raw corner and the bottom raw corner, mark 1" up the short side.
Using a ruler, connect the top 10" mark to the top 1" mark.  Repeat on the bottom.
This will shape the sides of the bag to taper in at the top.

 The tapered ends should look like this now.

Do the same with the interfacing.  Trim the extra 1/4",  then fuse it to wrong side of bottom gusset. Set aside.

To form the strap:
 Take the strap piece and press it in half lengthwise.  Open and fuse the strap interfacing to the wrong side along the pressed fold line.

 Once fused, fold both long edges in to the center and press.
 Fold over so it is now 4 thickness and topstitch 1/8" from each long edge.  Set aside.

 To form the inside zippered pocket.
 Take your inside zippered pocket.  To add the zipper, align the top edge to the edge of the zipper teeth.  Make sure the zipper is right side up, and the bottom end of the tape is slightly inside the pocket edge.  Fold any extra tape at the top edge under at a  90 degree angle to leave a neat edge.  Topstitch along the zipper tape about 1/8"- 1/4" from the teeth.  Use a zipper foot, or if your needle position adjusts, move it all the way over to the left.
 Take one of the inside lining pieces and fold over the top 4" and press.  Open. Using this fold as a guide, line up the pocket by - place it upside down so the unsewn zipper tape is along the fold.  The main part of the pocket should be extending over the top edge of the lining piece.  Stitch the zipper tape along the zipper teeth.  Fold the top end of the zipper tape under to leave a clean edge. Now fold the pocket down into place and topstitch around the 3 sides.  This is now the lining front.  Set aside
1                                                                        2
                                                                                            3
To form the inside gathered pocket.
Take the pocket piece and insert elastic in the casing.  Place on top of the back lining piece matching the bottom edge.  Stitch the bottom edge 1/4" from the bottom so the stitching will be inside the seam allowance.  
You will divide this into 3 pockets.  Place a pin  on the back lining piece at the 2  points where you want the pockets to divide. (I make the center pocket fit my cell phone) Stitch up from the bottom to the top edge -and over the elastic to form the first division.  Then pull the elastic taught so the center pocket is gathered well.  Pin the other division point and stitch from bottom to over the elastic to form the other side of the center pocket.  Now, on each side, pull the elastic taught to gather the rest of the pocket fullness to match the width of the lining piece.  stitch across the elastic and the sides to hold in place.  
Do this on both sides.


To form the front outside pocket, place the front pocket fabric and the front pocket lining right sides together, matching the top long edge.  Stitch a 1/4" seam.  Open and press the seam allowance towards the fabric piece.


Fold in half lengthwise and press.  You'll see that the fabric will extend over the edge and into the lining side.
 Using your elastic as a guide, sew a casing along the folded edge, leaving it about 1/8" wider than the elastic.


To attach the front pocket.
Stitch the elastic down, inside the side seam allowance to anchor it.  Pull the elastic taught until it is gathered evenly.  I make this rather tight as it tends to loosen as the bag is constructed.  Secure the elastic to the other end and trim excess.
 Carefully line up the front pocket to the bottom edge of the front piece, Lining up the centers of both pieces.  Pin the sides into place first.  Then working from the center out, pin in the fullness of the pocket along the bottom edge.  As you can see, I go a bit pin happy at this point.  Do not trim off the corner until you have this stitched in place.
 Once the front pocket is attached along both sides and the bottom, you can trim the corners to match the curve on the front piece. I leave the trimming until the end.  It should look like this now.
Take the string piece, fold it right sides together and stitch along the long edge.  Turn right side out and tuck in the ends so the raw edges are in, tack each end with a couple of hand stitches to hold them.  Fold the string in half and place the fold on the center of the front, just above the top edge of the pocket. Stitch across the string to secure it well.  This will be supporting the entire bag when you use it as a backpack, so stitch it well.


 Line up the front band at the center of the front of bag.  Extend the top to cover the stitching on the string.  Pin in place.
 Topstitch into place.  Do not stitch across the top.  You want to be able to tuck the strings inside the front band.  While stitching, pull the fullness of the front pocket out of the way.
 I should look like this. (Sorry the pic is upside down)
 Tuck the string inside.
 Now you will form the bag.
Do the lining first for practise.  Then do the same thing with the purse fabric.  You'll end up with two "bags", one of purse fabric and one of lining.
1. Mark the center of the bottom of both front and back pieces, and the center of the bottom gusset.  Taking the front piece, match the center to the center of the gusset, right sides together.  I only use one pin at this point.  Starting at the center, stitch a 1/2" seam along the bottom, around the curve and up the side.  If you hold the gusset in your right hand and the front piece in your left hand you can match them up as you sew.  Go slowly around the bottom corner.  Now, starting in the center again, stitch the other way, going along the bottom, around the curve and up the side.  This time the gusset will be on top.
There is extra allowance on each end of the gusset, so it will stick out even when the front and the back pieces are attached.


 When you have one side attached to the bottom gusset it should look like this.  The second outer bag piece will take some wrestling to hold while stitching, Just go slow.
 Again, the gusset will stick out on both ends.


Attach the back piece in the same manner.  You may need to wrestle with it a bit at this stage.
Doing this step with both the lining first, then with the fabric, you will now have 2 bags, a fabric one, and a lining one.

 With the fabric bag inside out.  With the lining bag right side out.  Place the lining inside the bag.  Match centers of top edges and centers of bottom gusset where it sticks out the top.  Leave a 4" opening along the top edge for turning.  Stitch along the top raw edge lining up the raw edges as you go.  Use a small stitch length so this is a strong seam.  Leave the side gusset pieces open.
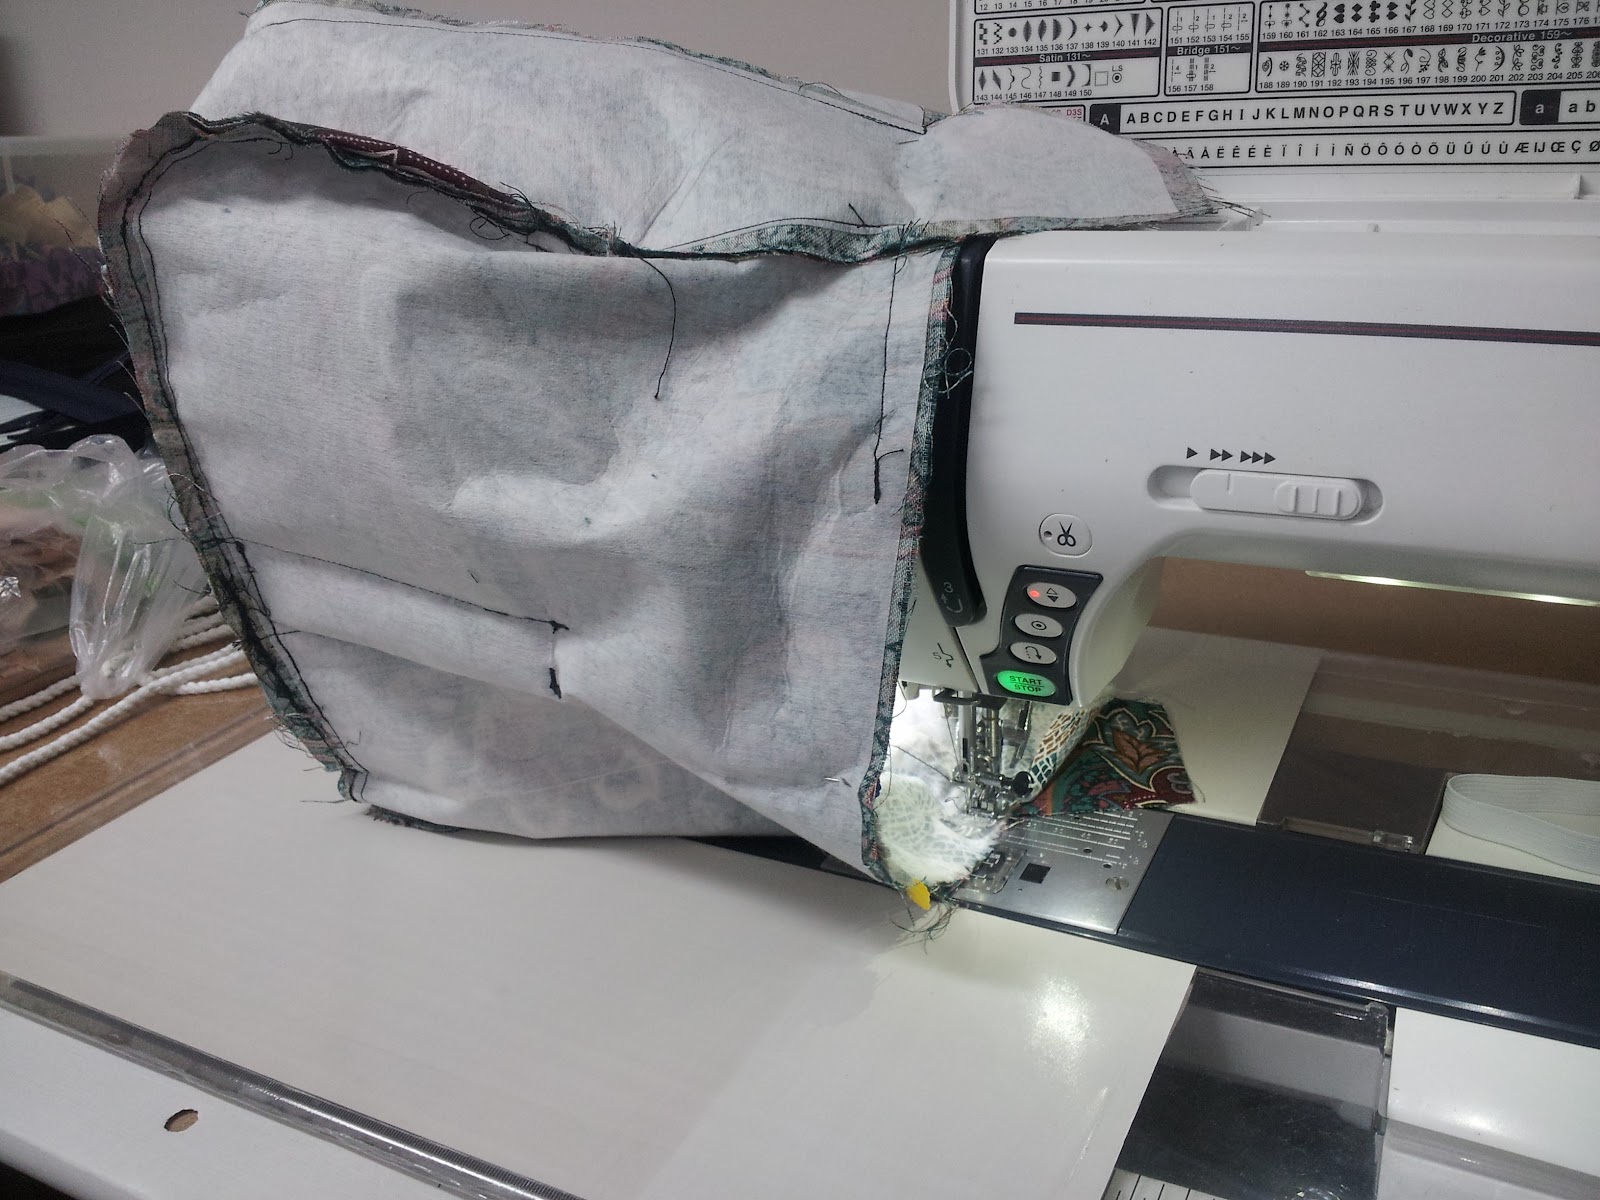

 Now wrestle the bag through the hole so the bag is right side out.  The lining should also be right side out at this point.  Push the lining down into the bag.  Turn out the ends of the bottom gusset - these will be tucked in later, but they're useful for handling at this point.
 Carefully press the top edge so that the lining does not extend over the outside.  It is preferable to have the lining inside the bag by about 1/16-1/8"  It is not necessary to stitch the turning opening closed, just press the seam allowances into place as if it were sewn.
 To form the strap, take one 1 1/2" rectangular ring, and one 1 1/2" buckle.
Take the strap and trim 4" off one end.  Take one end of the strap and fold over a 1/4", then fold it over the bar of the buckle and stitch into place.
Take the piece you cut off the strap and form a tab around the rectangular ring.
 You can stitch across the tab below the ring if you choose, but it is not essential.
 Take one end of the bag at the gusset ends.  Tuck the ends in and align the edge to be even with the rest of the top edge.  Slide the tab into the seam.  Center it on the side of the gusset.  Top stitch into place about 1/8" from the top edge.


 To attach the strap to the bag, take the raw end of the strap and feed it through the ring - from the inside to the outside.
 Feed the raw end up through the buckle and back down the other side.
 Using the same method that you used to secure the tab, insert the strap end into the other side and topstitch into place.


At this point the bag can be finished, by topstitching around the entire top edge.
 But I choose to add a zipper.
 To form the zipper part, take each of the two zipper tape extensions and press them in half lengthwise, wrong sides together.  With the zipper facing UP, topstitch one piece to each side of the zipper with the fold line beside the zipper teeth.  Check to make sure the zipper slides easily without catching the fabric.
Now place the zipper right side DOWN.  Carefully trim 1/4"  off the one layer of the fabric along both raw edges as shown.
 Press the top piece over the bottom piece catching the piece you trimmed under the fold.
 Trim each end as shown, and press the top over to form a taper at each end.

 Line up the zipper end with the side where the strap meets the top edge of the bag.  Pin it in place so that the top of the zipper lines up with the strap - right side down, and the raw end of the zipper extends into the bag by about 1/2"  Stitch in place, stitching along the same line of topstitching that secures the strap.  Be careful to not stitch over the metal stop on the zipper.

 Fold the zipper into the bag and again topstitch over the same line.


I stitch "backwards" at this point, with the bulk of the bag inside the harp of the machine.  It makes it easier to make sure the zipper is in straight.

Zigzag across the top end of the zipper to secure the two pieces together and trim off the extra zipper leaving about 1" to tuck in.

Fold the end of the zipper into the bag and top stitch across it.


The reason there is a string tucked in the front band is for when you want your hands free and to wear it as a backpack. Adjust the strap to its full length.  Using the string, tie the middle of the strap down to the front band.  You'll now have two loops to fit over your shoulder.
The strap can also be adjusted to wear across the body, or as a shoulder bag.

Sunday, September 23, 2012

FNSI, Life got in the way

Sorry blogpeeps, I have nothing to show for FNSI.  Life, as it often does got in the way.  Friday, I had to take my darling, extremely needle-phobic son to the doctor for his Grade 7 vaccines - hepatitis B and meningococcal.  Yes, 2 shots. I didn't tell him that part.  I picked him up at school early and off we went, his nerves getting the best of him all the way.  I asked him when we got there if he wanted to go in alone, or have me come along and I got a shrug, with "I don't know."  So when the time came, I just let him go.  Sob.  My baby is growing up.  The doc checked in with me and said he did fine.  Then he followed, arms crossed in front of him, hands holding each shoulder.  But he hadn't passed out - so that's good.  We had opted to have our family physician do the shots instead of having him line up with his classmates just to prevent any "loss of face" if he started to shake (the usual), cry (the usual) or pass out (often.)  Unfortunately the doctor told him about the booster shot in 6 months.  Oh, Happy March Break that will be.

Then I got the phonecall from my best buddy that her mom had passed away in the night.  Her mom had been in palliative care for 5 1/2 months with pancreatic cancer, so my buddy expressed a sigh of relief that it was finally over for her mom.  We spent a long time on the phone. 

So, that's why FNSI didn't happen.  Maybe I'll do better next month.

Tuesday, September 11, 2012

9/11 Etched in memory forever

If you were on this earth on 9/11, no doubt you will never forget where you were or what you were doing when you got the news.

I was feeding breakfast to my then 1 yr old son when I heard on the radio to turn on the tv.  I was watching when the second plane hit.
I remember thinking "Oh God help us, it's the beginning of WW III"
That night I went in for night shift and every available tv was on and turned to the news on some channel.  As the night went on, the sense of dread mounted.

Watching the rescue effort every day became too much for me to bear, so I stopped watching tv.  I have chronic depression and it was way too triggering.

What I want to remember is the sense of oneness in the rescue effort.  Everyone, from layperson to professional worked together with one goal in mind.  First to rescue anyone, anyone who might have miraculously survived.  Then to recovery, of as many people's remains as could possible be identified.

Now that the skyline, forever changed, is rebuilding, we will always remember.
Remember 9/11

Friday, September 7, 2012

Cancer sucks

Cancer, the big "C".  Whatever you call it, it sucks.
It hurts when it affects a friend or their family.
It hurts even more when it's your own family.
My sister has been told she has breast cancer.
It hurts.
Let's pound cancer into the ground.  By any means possible.

Wednesday, September 5, 2012

A new bag for me. FOXY

My old purse is starting to look rather tired.  She's served me well for, oh, a year and a half?  But the corners are starting to wear through, and frankly, with fall and winter on the way (gasp) I wanted something darker.


Well, I dug deep into my stash and found this big piece of polished cotton that appealed to me.  As usual, I made up the pattern as I went along, but I remembered a bag that my sister had that had drawstring pockets on the front and thought they were cool.
Instead of a drawstring, I used elastic.  She's big - 14" deep and 20 inches wide with a gusset 4" wide along the sides and bottom.  As usual, I put lots of pockets on the inside, one side has 3, the other has 1 zippered pocket.  New for me was the long strap - it is adjustable to be long enough to wear across the body.  I also used a new technique for adding a zipper to the top.  By adding a 2" strip of fabric along each side of  the zipper (I used folded fabric so the fold was along the zipper teeth), and then topstitching it to the top edge of the bag, it went in rather slick.  I added a second row of topstitching.  I think I'll still add a big old button to the center band for interest.

By the way.  In case you think I'm smart or something, I sewed a pin into the bag.  Yup, discovered it between the lining and the bag after I did the first row of topstitching around the top.  Luckily, I was able to make a little slit in the lining fabric right next to the row of stitching and got it out.  The when I did the second row of topstitching, the hole was caught in between the rows and closed.  Duh moment !

Here's a peek.  I'm calling her "Foxy"


Sunday, September 2, 2012

Who doesn't need a quilty binder for back to school?

My son likes playing Minecraft.  Actually, he lives and breathes Minecraft.  So, when the back to school shopping happened, the black vinyl binders just didn't cut it and I offered to make a quilted cover.  He surprised me when he said "that would be cool.!"
Wow, what a great son!
So the thinking began.  How do you make a masculine binder cover that he would be proud of when his favorite colors are black, gray, and black.
So, inspiration struck.  Why not made a pixelated quilt with a minecraft theme.
An idea was born.  Have a peek.
Yes, those are 3/4" squares of fabric fused onto a base fabric, and then quilted.
I think it turned out pretty well,  and so does he :)


So, just like many of our photo sessions, it ended up with a photo of Rob and Neeka.  They're both cutie pies!

Tuesday, August 28, 2012

Talkin' Tuesday and GenQ Magazine

Tonight was a hoot.  GenQ Magazine was sponsoring Talking Tuesday - see buttons on sidebar.  Up to its usual hijinks, GenQ brought out the best in the chatters.  We even got to chose what our super hero name would be if we could be a quilting superhero.
I mentioned that since "Captain Buckethead" was taken in our house, that I'd have to pick another name.  This drew a couple of ?? replies.
So here he is, fresh out of retirement in Bucket City,
Captain Buckethead !!
aka my darling 12 yr old son.
I think I'm going to have to insist he use a quilt for his cape,
 but then Superman's mom didn't tell him what to wear, did she?

Sunday, August 26, 2012

Batik BOM #2 finished

Today's finish is another customer's quilt.   It is the same pattern as the last one but in a different colour way.  It also got a much different quilting treatment.  This time I made feathers.  Feathers in many different combinations.  The different blocks, of the Block of the Month pattern, received a different pattern.  The cornerstones that connect the blocks received a continuous pattern to accent their linear feature.  The filler blocks that were all the same received the same circle of feathers., half a circle in the side triangles.   As I do for all my customers who wish it, I serged the edges to make it easy and neat for binding.
So, here's a peek.


Time to vacuum the sewing room.

Thursday, August 23, 2012

My baby's back....

Yesterday I got a call from the sewing machine hospital to say my baby was ready to come home.  She had a general overhaul and cleaning.  I vacuum out the bobbin area regularly but the tech was still able to remove a ball of fluff the size of a large grapefruit from inside the machine.
The lesson - get that regular servicing !!
She has a new bobbin case (see story below) and the total bill was less than I was expecting so it's all good.
And she's sewing like a dream.

The new bobbin case is because I put a needle through it a while ago.  I broke a needle and when I went searching for the pieces, I found the tip gouged into the side of the plastic bobbin case.  Being the frugal (cheap) sort, I smoothed it out with a scissor blade and got it up and running.  But since baby was going into the shop anyway, I figured I'd spring for the new one.  I'm happy with that decision. :)

Now, on another note.  Do you need rain??  Just send me camping.  Both of our camping trips this summer were cut short because of rain..  Camping in a tent, with an 11 yr old, and a dog, when it's raining and the forecast is for more rain-- isn't fun.  So, both times we went home.  This time it took 2 weeks !!!!! for the tent to dry out.  Every time it was almost dry enough to pack up , it would rain again.  AAAAAAAHHHHHHHHH !   I think we're done for this year.   I need to win a lottery and get a trailer.  But then, if it were a big enough lottery, skip the camping and do the 5 star resort is what I say!

Saturday, August 18, 2012

August FNSI

This was quite a night.  I think instead of calling it FNSI, I'll call it Wrestlemania Marathon.
I worked on a customer's quilt.  I had half of the quilting done by yesterday, so I figured it would be a cinch to finish it tonight.  Wrong in so many ways.
I started sewing this afternoon and met problem after problem.  The thread kept breaking.  I blamed the thread, as it was embroidery weight - not what I would have picked.  That and the bobbin thread was quite a bit thicker as it was 100% cotton "machine quilting" thread.  Also not what I usually use.  So, I tried to tough it out.
Rethreaded top and bottom, too many times to count
Changed the needle
Changed the bobbin
Changed the bobbin thread as I had the same colour in "my fav" thread
Changed the top thread
Changed them all again, a few times,
Still, every foot or so, the thread would shred and I would let out a few of those words that my mama would have washed my mouth out with soap for saying.
So, I went to Costco. I came home and made a delicious fruit salad of strawberries, watermelon and red grapefruit.


 And I walked the dog.
  Then downstairs I went again.
Finally in frustration, I pulled my machine out of the table and put in my backup/take to class machine.
Should have done that in the first place, it worked perfectly.  No more thread problems.
So, it wasn't the thread, or the bobbin, or the needle etc.
It was my machine.
So, I'll be taking her to the doctor tomorrow. 
So, in the meantime, I wrestled that quilt through the smaller machine and got 'er done.  Serged the edges, and packed her up.  Hopefully the recipient is home tomorrow and I can deliver it.


 A closer look at the quilting.  Overall daisies on the quilt, and a chain of daisies on the border.
 Packed and ready to depart from my home.
This is one quilt that did not find a soft spot in my heart.  If it had been mine, it would probably be in the darkest corner of a closet by now.