For those who have a good sense of humour, and can't wait for the wedding of Prince William and Ms Kate Middleton, well, here's a little something to bide your time.
https://www.youtube.com/watch?v=Kav0FEhtLug&feature=player_embedded
Enjoy!
Saturday, April 23, 2011


Sunday, April 17, 2011
I just went in to buy sewing machine needles......
I really did. Honest. I was in Michaels and look what jumped into my cart. These cross stitch kits retail for about $50. They were on for $9.99, so I got two. Score!


Saturday, April 16, 2011
April FNSI
Oh what a night.......as the song goes. I had a productive FNSI this month. I started right after "school" which means after I picked up my son and brought he and his friend to their club for their Friday night fun time. He's taking the club bus home now so that means it takes me 5 minutes to pick him up instead of 30. Bonus!
I'm doing the machine quilting on a friend's butterfly quilt. So that's what I finished last night.
With my trusty sidekick at my side
XL, double-double, stirred, not shaken.
I finished the stitching around each appliqued butterfly and then did a serpentine stitch in the narrow sashing. That's stitch # 19 at a stitch length of 4.0 and width of 5.0 on my Horizon. I can see myself using that again! I love how it made the sashing puff up.
 This is why I LOVE my walking foot.
 Serpentine stitch in the sashing.
Then I thought about what to do in the wide border. First I did a freehand butterfly in the corner. Well, let's just say: Madame Butterfly, meet Mr Frog. That butterfly was so NOT symmetrical and had a mishapen head to the point where one had to use a lot of imagination to decide that it was, indeed, a butterfly. So it came out.
That's when I decided 2 things.
1: I needed to use a paper template and
 One seriously abused paper template.
2: I needed to stitch from the back so I could see what I was doing.
That was a good move, because it went a lot smoother from there. So now there was a full butterfly in each corner with a "in flight" butterfly around the perimeter. Between the "bugs" there is a swirly line to indicate the flight path. One of the butterflies is a true romantic, she flew in a heart shaped path. Another was a little tipsy and did many loops in a row before meeting the next one. :)
 Butterfly in flight.
The outer border needed something a little plainer, so I just did loopies about the size of a quarter.
By midnight, I was done. In more ways than one.
 Back of stitching around applique in blocks.
This morning I called my friend and told her it was done - she couldn't believe it. I put 14 hours into stitching it, all in about 4 days. So I think that was pretty good!
 Pretty as a picture, don't you think?
I'm doing the machine quilting on a friend's butterfly quilt. So that's what I finished last night.
With my trusty sidekick at my side

XL, double-double, stirred, not shaken.
I finished the stitching around each appliqued butterfly and then did a serpentine stitch in the narrow sashing. That's stitch # 19 at a stitch length of 4.0 and width of 5.0 on my Horizon. I can see myself using that again! I love how it made the sashing puff up.
 This is why I LOVE my walking foot.
 Serpentine stitch in the sashing.
Then I thought about what to do in the wide border. First I did a freehand butterfly in the corner. Well, let's just say: Madame Butterfly, meet Mr Frog. That butterfly was so NOT symmetrical and had a mishapen head to the point where one had to use a lot of imagination to decide that it was, indeed, a butterfly. So it came out.
That's when I decided 2 things.
1: I needed to use a paper template and
 One seriously abused paper template.
2: I needed to stitch from the back so I could see what I was doing.
That was a good move, because it went a lot smoother from there. So now there was a full butterfly in each corner with a "in flight" butterfly around the perimeter. Between the "bugs" there is a swirly line to indicate the flight path. One of the butterflies is a true romantic, she flew in a heart shaped path. Another was a little tipsy and did many loops in a row before meeting the next one. :)
 Butterfly in flight.
The outer border needed something a little plainer, so I just did loopies about the size of a quarter.
By midnight, I was done. In more ways than one.
 Back of stitching around applique in blocks.
This morning I called my friend and told her it was done - she couldn't believe it. I put 14 hours into stitching it, all in about 4 days. So I think that was pretty good!
 Pretty as a picture, don't you think?
Thursday, April 14, 2011
A cute Easter Craft - Door stop Bunny
Check out this link for a cute bunny craft. It's a doorstop Bunny! Great for holding doors open now that we've got windows open to air out the house. It keeps those doors from slamming shut in the breeze.
http://weefolkart.com/content/doorstop-bunny
Enjoy~
http://weefolkart.com/content/doorstop-bunny
Enjoy~
Monday, April 11, 2011
FNSI
It's that time again! This Friday, April 15 th is another Friday Night Sew In. Can't wait. I'll be lining up the projects all week. Sign up by checking out Heidi's blog or just click on the link on the left of this page.
Hoot hoot!
Hoot hoot!
Friday, April 8, 2011
What's been happening these past 2 weeks.
Forgive me for deserting you for the last 2 weeks or so. Life got in the way, as it has a way of doing. My darling son "survived" his first two dental appointments and still likes the dentist. That alone is a feat since he is probably the biggest needle-phobic this side of Mars.
That being said, we both got new glasses as well. His are really cool, and he likes them enough that he's wearing them without nagging!
Mine were a style change. I like them. My dog doesn't know who I am. She just stares at me.
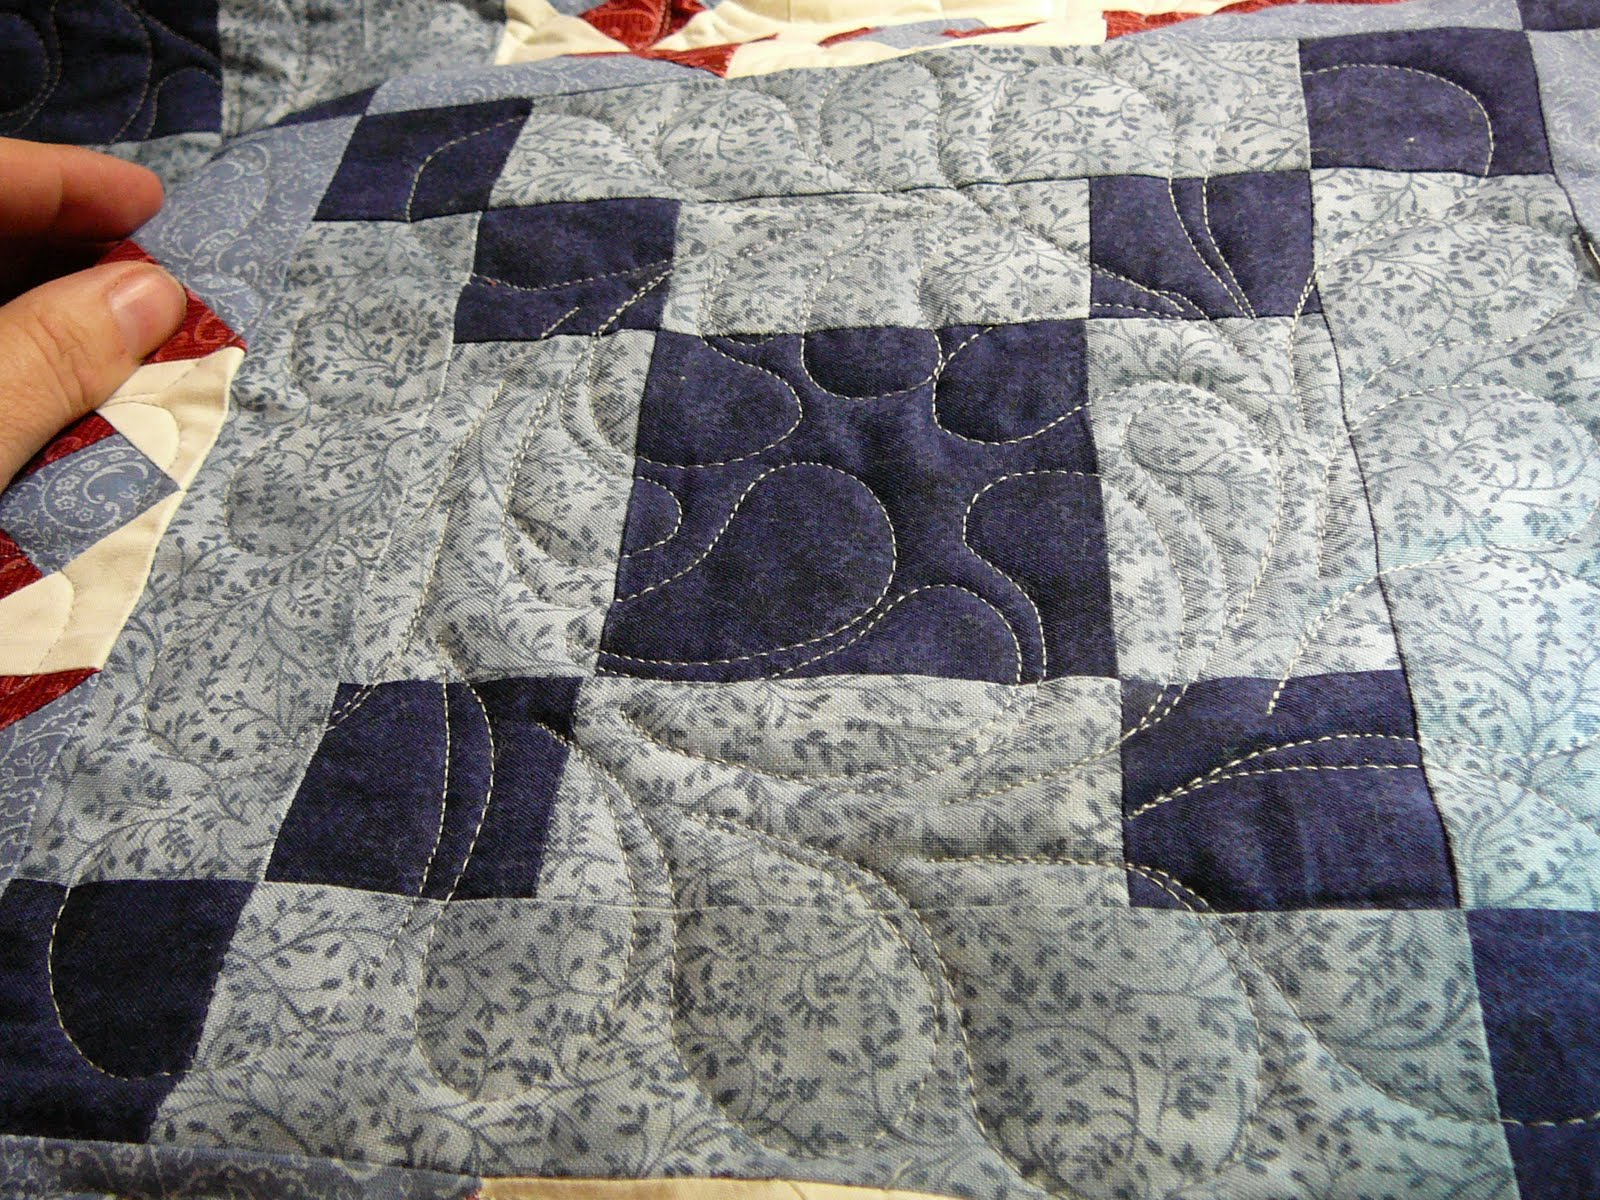
I've managed to get some quilting done on Katie's quilt. After auditioning several patterns, I settled on a circle of feathers in each block. It looks good!

 I've also been working on the cross stitch project that I started in February at my "girls weekend" away. I've just got the last corner to do and then it will be ready for blocking. I am really loving the richness of the colours. I am, however, eager for it to be done. I dare not put it away or it will become a UFO, lost in the closet somewhere. I've got too many hours into it for that!
 So, that's what has been happening here. The snow has melted. The days are warmer than the freezing point most of the time. We're starting to see the sun on a regular basis. Life is good.
That being said, we both got new glasses as well. His are really cool, and he likes them enough that he's wearing them without nagging!
Mine were a style change. I like them. My dog doesn't know who I am. She just stares at me.
I've managed to get some quilting done on Katie's quilt. After auditioning several patterns, I settled on a circle of feathers in each block. It looks good!

 I've also been working on the cross stitch project that I started in February at my "girls weekend" away. I've just got the last corner to do and then it will be ready for blocking. I am really loving the richness of the colours. I am, however, eager for it to be done. I dare not put it away or it will become a UFO, lost in the closet somewhere. I've got too many hours into it for that!
 So, that's what has been happening here. The snow has melted. The days are warmer than the freezing point most of the time. We're starting to see the sun on a regular basis. Life is good.
Tuesday, March 29, 2011
Katie's quilt.
I've been working on the "TicTacToe" quilt for my niece Katie. It's come along quite nicely once I got those tiny 4 piece blocks done. So, here's a pic of the quilt top so far.
 Now I'm auditioning borders. I want to use the three colours in a border but I'm not sure of the widths. So here's pics of the three I've looked at so far.
Door # 1
 Door # 2
 And Door # 3.
 I think I like Door # 3 the best. How about you? How do you choose what to use for borders?
I'm going to use the dark navy as the binding.
Now all I have to decide is how to quilt it. Any suggestions?
(And don't say "with thread!")
 Now I'm auditioning borders. I want to use the three colours in a border but I'm not sure of the widths. So here's pics of the three I've looked at so far.
Door # 1
 Door # 2
 And Door # 3.
 I think I like Door # 3 the best. How about you? How do you choose what to use for borders?
I'm going to use the dark navy as the binding.
Now all I have to decide is how to quilt it. Any suggestions?
(And don't say "with thread!")
Saturday, March 19, 2011
Friday Night Sew In, a finish ready for gifting.

This is my nephew Terry's quilt. I started it in February, then got distracted by another quilt, and some cross-stitching, and some parenting, etc. It's been on the frame for 2 weeks waiting for me to quilt it. Tonight was the night. What better project to do on a FNSI. So, after 2 1/2 hours the quilting was done. I was able to square it up and put the binding on, sew down the binding by machine and tuck in all the loose threads tonight. Now, it's ready for gifting, which is a good thing since his birthday is less than a month away!.

Friday, March 11, 2011
Remember how your teacher always told you to read the entire test before starting?
 Well, this is why. This is a lovely pattern, and I'm making it for another niece. It was written in 2006, that's not before rotary cutters were born. So just why does it have antique instructions?
 See that little line about cutting 136 little 1 1/2" squares? Then you have to assemble them into 4 patch blocks.
Cutting 136 little squares, of two colours, so that is 272 little, tiny, 1 1/2" squares.
Well, that's just not going to happen in my reality. Strip piecing, here we come.
I always have difficulty getting my blocks exactly square, so I like to cut them a bit bigger, then trim. So here is where the "read it before you cut" part comes in.
 Take one strip of each colour and sew them together, then layer one on top of the other so that the red is on the blue, and the blue is on the red. Nest them together so the seam is lined up.
 THEN cut them into units 1 1/2" wide (I did 1 3/4") , Keep the two layers together, then sew a 1/4" seam down one side. Presto - 4 patch. Now I trim it to the required 2 1/2" square.
 So now the pattern calls for adding a 3"triangle ( 3" square cut in half) to each of the four sides of those teeny, tiny 4 patch squares.
 There's that little line about cutting 136 squares into triangles. Deal with all those bias edges? Well, that's another little thing that I avoid at all costs. So, here's h0w to avoid working with bias edges.
 First take that 3" square and draw a pencil line across from point to point.
This is where you WOULD HAVE cut it.
Now take one four patch and line it up on that line. Sew it on using a 1/4" seam. *For illustration I used only a 2 patch piece.* You can extend your stitching onto the back triangle if you want because the little point at the top and bottom will be trimmed off later.
 Now turn the whole unit around, and sew another four patch against the other side of the line.
 Of course, you will sew several of these in a row before proceeding with the next step, right? Now, cut them apart through the middle. This way the bias edge is sewn down already and is stable. Press open, then repeat with the other side of the four patch so you have a triangle on opposite sides now. Trim off the little tips. I stacked three on top each other , then trimmed.
 Now do it all over again to the other two sides of the four patch. This time don't bother to trim the tips off because you'll be trimming the whole patch to 3 1/2" square.
 Find the reference marks you need on your ruler of choice, and trim the blocks to 3 1/2" square. Note how the 45 degree angle mark lines up with the seam in the four patch.
 Ta da~ One teeny, weeny, floating four patch. It's "floating" because the points of the four patch are not designed to reach the edge of the block when the side seams are sewn. So, it "floats" in space between the blocks on either side of it. Repeat until you have 68 of these little beauties.
It seems fiddley. But it's still easier than handling 1 1/2" squares, bias edges, and trying to get them square and on size.
Now, why didn't the pattern show that?
Monday, March 7, 2011
It's Friday Night Sew In time!!
Well, it's time for another FNSI. March the 18 th is the night. If you've never joined this virtual sew in, it's time! There's prizes to be had and everything, and you get some stitching done. Could there be anything better?
Just click on the FNSI banner on the left sidebar and it will take you to the signup link on "Handmade by Heidi". Then get ready to sew!
Just click on the FNSI banner on the left sidebar and it will take you to the signup link on "Handmade by Heidi". Then get ready to sew!
Subscribe to:
Posts (Atom)