
Saturday, December 31, 2011
Wednesday, December 28, 2011
Yay! Snow!
Before you shoot me, let me explain. I used to ski, a lot, before the arthritis put an end to it. When you're a skier, your whole attitude about snow and winter is different than the general population. A skier is trying on their gear in October in preparation for the season. So, this skier may be off the hill, but the attitude is still in my heart.
With that said, "Yes! Finally there is snow!" To top it off, the weather is cold enough for the snow to actually stay on the ground.
However, the weather people are predicting +7 degrees C in two days. Sigh.
With that said, "Yes! Finally there is snow!" To top it off, the weather is cold enough for the snow to actually stay on the ground.
However, the weather people are predicting +7 degrees C in two days. Sigh.
Monday, December 26, 2011
Have you signed up for the Free Motion Challenge? It starts Jan 1
Well, have you?
This will be a year long challenge that will guide you through boosting your FMQ skills. And there's prizes too.
What have you got to loose?
Hit the button to the left on this blog, and then make sure to "Like" SewCal gal on Facebook to get daily updates and chat with other quilters.
It all starts January 1, 2012, so fire up your sewing machines, get the quilt sandwiches ready and let's quilt!
Ah, Christmas !
I love it. When there are little ones around, it only gets better. I have 3 great nieces, age 7, 5, and 2, and a great nephew aged 3. They were a hoot. The girls' gift was the box of doll clothes, and they dove in with squeals and wide eyes. The youngest kept pulling things out one by one like she was tossing fat quarters out of a stash basket! lol.
The little guy got a battery operated car that lights up and makes noise. What better gift for a 3 year old boy!
The family gathered around, we noshed all afternoon, and had a great time.
It helps when you have a family that can laugh, cry, and talk together forever!
I am blessed.
Merry Christmas.
The little guy got a battery operated car that lights up and makes noise. What better gift for a 3 year old boy!
The family gathered around, we noshed all afternoon, and had a great time.
It helps when you have a family that can laugh, cry, and talk together forever!
I am blessed.
Merry Christmas.
Sunday, December 18, 2011
Selling my Featherweight


I have to do it. She's pretty, and she sews beautifully, but she needs a home where she'll be used and maintained, not stuck in a closet.
She is a 1947 Singer 221 "Featherweight" She's in remarkable condition, and comes with the original case and all the trinkets. The case is in "good" condition, but the bottom edge has been reinforced with a duct tape that blends in colour.
If you know of anyone, or a Santa, that is interested in giving this girl a new home, please email at tjzoriginalz@hotmail.ca I'll consider any offer over $300 Can, plus shipping.
A new project
A little while ago, I met a woman who asked me to make a quilt of her late husband's neck ties. Although I had heard of them, I had never made one. I was grateful then, that she had a photograph of what she had in mind. So home I came with four hangers full of ties, and a plan.
It took me a while to get started on this quilt, I did a lot of planning in my head , while I finished up some projects on my schedule. I spent some time taking the ties apart and removing the center interfacing.
So, now I've started. I made a paper template for the center medallion. After pinning the ties in place (half the circle at a time) I used a ladder stitch (#108 on my Horizon) to join the ties together. Some of this was a bit tricky as the silk ties tend to slip and twist because they're all cut on the bias.
I'm not going to post photos until the quilt is done and given to its recipient, but I will describe how it's going.
The background fabric will be the same satin that I used for the church banners, even the same colour.
The backing will be a beautiful forest green flannel.
Check in once in a while for an update. I'll be glad to "see" you.
Thursday, December 15, 2011
Packing up Santa's Workshop
I finished up the lot of doll clothes that I've been sewing lately. The box is full, so I'm done. Here's a few pics of the last creations - some dresses, some hoodies, and some pant and vest sets.
 Hoodies, and lacy blouses
 Dresses of many colours
 Summer jammies, and doll quilts
 Vest and pants sets - retro to the '70's
 Vest over lacy blouse, and another hoodie for the small bear
 Sundress, shortie overall, denim vest set and dolly diapers!
Now I have to get down to some serious quilting. I miss it!
The second FNSI for December is this Friday, however, it coincides with my son's school Christmas concert so I'll be there instead of sewing. This year, his grade is in Junior Band. He'll be doing his first school concert as a drummer. He was wondering aloud tonight if he'll be able to use the big drumset that's in the church, or whether he'll have to just use the snare drum from school. I was amazed when he said he'd prefer to use the big drumset! Usually he's so shy about any kind of public performance. Could it be ?? that he's getting over that? (fingers crossed)
Tuesday, December 13, 2011
Doll clothes production still in progress...
The factory is still in production. Since I posted last, the collection of doll clothes has grown. The box now has 3 more dresses, 2 skirts, 3 doll quilts, 3 camisoles, and 9 dolly diapers. The diapers were a request, I guess the girls at my niece's house are really "into" changing diapers. Ha ! Just wait 'til they get older!!
So, anyway, the box is filling up. I plan to keep all the clothes in one box, wrap it up and let the 3 girls dive in. Should be fun to watch!
So, anyway, the box is filling up. I plan to keep all the clothes in one box, wrap it up and let the 3 girls dive in. Should be fun to watch!
Friday, December 9, 2011
More Santa Sewing for FNSI
For FNSI this week, the doll clothes making continued. First, new leotards for the crew from some repurposed knit from a shirt bought at a thrift store . Muslin Sally is a standin for my great niece's "Lucy", who's well loved and all her stuffing has squeezed down to her bum!

Add a little tutu and they're ready to dance :)

Eyelet fabric makes cute summer nighties.....

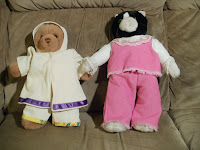
Then it's dress up time. "Muslin Sally" has a trenchcoat and skirt combo, Goldie Bear has a pink/red/yellow print dress with poofy sleeves, and Spot is sporting her favorite yellow number with a bow on the front.

The designer is pooped for now, so that's it for tonight. It's a good start to the 'box' of clothes for my great nieces. I've suggested to my niece (their mom) that when they graduate to "real" dolls, that she get them the same size doll. That way they can practise sharing clothes, to get ready for their teen years when they'll be doing it for real !

Add a little tutu and they're ready to dance :)

Eyelet fabric makes cute summer nighties.....

Then it's dress up time. "Muslin Sally" has a trenchcoat and skirt combo, Goldie Bear has a pink/red/yellow print dress with poofy sleeves, and Spot is sporting her favorite yellow number with a bow on the front.

The designer is pooped for now, so that's it for tonight. It's a good start to the 'box' of clothes for my great nieces. I've suggested to my niece (their mom) that when they graduate to "real" dolls, that she get them the same size doll. That way they can practise sharing clothes, to get ready for their teen years when they'll be doing it for real !
Wednesday, December 7, 2011
A little gift-y sewing
This week I've gotten very little quilting done. Instead, I've been sewing doll clothes. My friend's 2 youngest girls are getting American Girl dolls for Christmas, so she got a McCall's pattern for 18" doll clothes and well, I've been "using up a few scraps" and leaving them in her mailbox.
Then, last night I was speaking with my niece and asked if her girls (age 7, 4, and 2) had dolls that she wanted clothes for. She jumped at the chance. Her girls are in the stuffed "animal-doll" stage, so I had her give me some measurements to work on. Luckily, one of the dolls is a "Build a Bear" and my son has one of them, so it was pressed into model mode.
First up - pyjamas. The oldest child's doll has been well loved, and her stuffing has headed south, so pants will be a problem. She gets a nightgown.

The next one is still loved alot, but has held her stuffing in place, so she'll get pyjamas.

The third one is going to have to wait until tomorrow, because I got into my stash of "loud" fabric. Now this cat's going to Hawaii.

Uh oh, she's gotten into the margaritas! This saga may have another chapter!

Friday, December 2, 2011
Sewing club does it again = zippers!!
Our little sewing club is moving right along! This week we finished our aprons by making a pocket and sewing it on by topstitching around the three sides, leaving the top open.
Then they got to go crazy picking out two 7"x10" rectangles from a collection of brights I have in my stash.
They sewed a zipper into the top seam - and everyone got it right - the first time !!! Yay! They're 11, they've only had 3 lessons and they've conquered the zipper! So folks, the bar has been set. Anyone who's been sewing for longer than they, has no excuse to avoid zippers now. ha ha.
Once the zips were in, the folded the fabric in half and sewed the side and bottom seams. After clipping half the seam allowance, then they zigzagged that raw edge.
To box off the bottom, they cut 1 1/2" squares out of the bottom two corners and then refolded that corner and sewed across it. Everyone got it !! Woohoo!
The rest of our time was spent going over sewing machine maintenance. Each one learned how to open up the bobbin area and clean out the lint. The machines all had a good collection of lint so they really got to see what a difference cleaning your machine makes. Good idea to make them take the responsibility for cleaning their own machine right from the start.
And now, the big reveal. BTW Miss C, someday your face might freeze that way lol .

Monday, November 28, 2011
This week's sewing club = Aprons!! and a little sewing on my own.
This Saturday, our little sewing club met for its second class. This time after spending some time oohing and aaahing over the one gal's brand spanking new Janome (an early Christmas present from her parents), we spent some time learning how to wind a bobbin, insert it, and thread our machines. Then we chopped up some Mens cotton dress shirts (from Goodwill) and repurposed them into : Aprons !! We almost got done. Just the pocket to go, so we'll add that to next class. Then we took a road trip to the fabric store. Each girl chose her favourite bolt of flannel for pyjama pants. Once everyone was hugging a bolt - literally- we went to the cutting table, then chose thread, then they got to go home. We're meeting again this weekend to get back on schedule. The topic this week is zippers. We'll make a zippered pouch. This way they each have time to prewash and dry their flannel fabric in time for the next class which will be reading a pattern, and starting on our flannel pants.

My sewing time this week was spent finishing up the banners for the church. I also brought my first 3 purses to RedBird Designs for sale. I figured I'd better bring some in to see if the styles were what she was looking for before I had 5 or 6 done. She loved them so that felt good :)
Tonight I worked on a new bag pattern and made the first prototype. Of course, I forgot to get a longer zipper, so I improvised and used two small ones head to head. I kind of like it!
This purse is fully lined with one interior pocket. The front and back are upholstery weight fabric and the piping is made from another swatch of similar colour. Once I had the bag made I felt it needed a more substantial handle than a single webbing strap so I stitched two together. Once I added the strap, I then wrapped the joining area with another piece of webbing (to disguise a few boo boos). Then got out the FrayCheck and dabbed any remaining frayables.
I like this one. I think I'll have to use this pattern again = but I have to do some tweaking on the ends of the zipper where it meets the handle. We won't discuss how many needles I broke attaching the handle.


Monday, November 21, 2011
The Freemotion Quilting Challenge
This is a year long, monthly tutorial for freemotion quilting. I am so excited to join because we all know you never stop learning - right? Learning new things keep you young and who doesn't like that.
Stop on the button on the left to check it out - and sign up today!
Stop on the button on the left to check it out - and sign up today!
Friday, November 18, 2011
FNSI Results
Tonight's project was continuing to work on some banners that my church asked me to make into quilts. The design was already made, I just needed to interpret it into fabric.
I had decided that this would need to be out of a fabric with more character than quilting cotton, and after looking at some options, like upholstery cottons and the like, found them to be way, way out of the budget range.
So I went back to the fabric store for another look and happened upon the bridal satin area. Eureka. That was the solution. At $22/meter, that was far better than the $60+ that the other was.
The colours were available too, so then it was just the technique that had to be ironed out. I decided on reverse applique for the logo, and had the lettering done by a local embroidering company.
Once that was done, it was time to play. I found working on satin very soothing. It catches the light and plays with it while you're working with it and it slides through the machine easily. Then there is the tactile sensation of working with its silky texture, that is just amazing.
I used a freemotion design I saw on Leah Day's freemotionquilting.com site. She is an amazing quilt guru. I follow her blog daily.
So swirling water it would be, somewhat symbolic, as water is used for baptism into new life, and this banner is in honour of a renewal, or "rebirth" of our congregation.
I soaked the quilt and blocked it by stapling it to a frame of 1"x2" bars. When it is dry, I'll be able to square it up and bind it.
So, without further adieu, Here is the Bethel Renewal Banner.


Wednesday, November 9, 2011
eBook reader cover-more playing with Jay McColl's "Habitat"
I had more of Jay McColl's "Habitat" fabric, so I just had to play. I made a new eBook cover for my Kobo Touch. Since the last one was denim, this time I made it girly. I don't get to do pink and lace very often since I'm the only girl in my house of a boy and 2 men.
So here goes.
First cut a panel of light cardboard twice the size of your eBook, adding an extra inch and a half to the longer side.
Cut one panel each of the front and inside fabric, the size of the cardboard plus a half inch seam allowance on all sides.
Cut one strip of contrast fabric 3" wide by the length of the other panels.
Cut one strip of outside fabric 2" wide and 3" longer than the contrast fabric.
You need about 12" of lace,
cut a 1" square of hook and loop tape (both parts) and a small piece about 1/4" wide.
Place the eReader on one end of the cardboard, 1/2" from the end. Mark this line on the cardboard. Do the same thing from the other end. You should now have a long rectangle with two lines across the middle. Score the lines and fold the cardboard along those lines, lay flat again and set aside.
Take the contrast fabric strip and fold under 1/4" along each long edge and press.
Place it centered on the right side across the length of the outside fabric and topstitch in place.
Take the strip of outer fabric and again press over 1/4" along each length. Center it on the contrast fabric, leaving the extra length extending out one side. Top stitch in place leaving the 1/2" seam allowance on the tab end free.
On the front of the fabric, stitch one part of the Velcro onto the center strip , 1/2" in from the edge without the extending piece.
Fold over the extending piece so the raw edge reaches 1" over the edge of that side of fabric. Mark the place for the other piece of Velcro and sew it only to the inside layer of the flap. Add decorative stitching at this point. Set aside.

On the right side of the inner fabric, center the eBook onto the right side, leaving 3/4" in from the right edge. Mark the top sides, 1" down from the top, and mark the top center. Mark the bottom sides 1" up from the bottom and the center bottom.
Taking one piece of lace, stitch the end (bar tack) to one mark on the top sides, measure it to the top center and add 3/4", then stitch it down at the top center mark, measure the same length and stitch that end to the mark on the other side of the top.
On the bottom, take a piece of lace 1" longer than the one you used on the top. Fold it in half and stitch one of the small pieces of Velcro to it so it sticks out like a tab. Now stitch the left and right ends to the left and right bottom marks the same way you did the top loops. Insert the eBook so the top corners go under the lace corners.


Top Bottom
Pull the bottom lace up over the bottom edge of the reader. Fold the lace down over the corners so it is similar to the top corners and mark the place underneath where the Velcro will meet. Set aside the eBook and stitch the other part of the Velcro at that spot.
Place the outer fabric and the inner fabric right sides together and stitch the 1/2" seam allowance around 3 sides. Be careful not to catch the Velcro piece in the side seam, and leave the end with the extending flap open.
Trim the corners, turn right side out and press.
Slide the cardboard into the pouch making sure the inside seam allowance stays flat and on one side of the cardboard so it doesn't bunch up.
On the open edge, fold in the seam allowance, folding the raw edge of the flap into the opening so it catches in the seam, leaving the rest of the flap extending out. Top stitch this opening closed.
Insert the eBook into the top lace loops and so the bottom of the reader is under the


bottom lace loop. Fold the lace over the bottom corners and secure the center piece of Velcro under the reader to the piece underneath. Fold over the cover and secure the Velcro flap.


Now, go read a book :)
So here goes.

First cut a panel of light cardboard twice the size of your eBook, adding an extra inch and a half to the longer side.
Cut one panel each of the front and inside fabric, the size of the cardboard plus a half inch seam allowance on all sides.
Cut one strip of contrast fabric 3" wide by the length of the other panels.
Cut one strip of outside fabric 2" wide and 3" longer than the contrast fabric.
You need about 12" of lace,
cut a 1" square of hook and loop tape (both parts) and a small piece about 1/4" wide.
Place the eReader on one end of the cardboard, 1/2" from the end. Mark this line on the cardboard. Do the same thing from the other end. You should now have a long rectangle with two lines across the middle. Score the lines and fold the cardboard along those lines, lay flat again and set aside.
Take the contrast fabric strip and fold under 1/4" along each long edge and press.
Place it centered on the right side across the length of the outside fabric and topstitch in place.
Take the strip of outer fabric and again press over 1/4" along each length. Center it on the contrast fabric, leaving the extra length extending out one side. Top stitch in place leaving the 1/2" seam allowance on the tab end free.
On the front of the fabric, stitch one part of the Velcro onto the center strip , 1/2" in from the edge without the extending piece.
Fold over the extending piece so the raw edge reaches 1" over the edge of that side of fabric. Mark the place for the other piece of Velcro and sew it only to the inside layer of the flap. Add decorative stitching at this point. Set aside.

On the right side of the inner fabric, center the eBook onto the right side, leaving 3/4" in from the right edge. Mark the top sides, 1" down from the top, and mark the top center. Mark the bottom sides 1" up from the bottom and the center bottom.
Taking one piece of lace, stitch the end (bar tack) to one mark on the top sides, measure it to the top center and add 3/4", then stitch it down at the top center mark, measure the same length and stitch that end to the mark on the other side of the top.
On the bottom, take a piece of lace 1" longer than the one you used on the top. Fold it in half and stitch one of the small pieces of Velcro to it so it sticks out like a tab. Now stitch the left and right ends to the left and right bottom marks the same way you did the top loops. Insert the eBook so the top corners go under the lace corners.


Top Bottom
Pull the bottom lace up over the bottom edge of the reader. Fold the lace down over the corners so it is similar to the top corners and mark the place underneath where the Velcro will meet. Set aside the eBook and stitch the other part of the Velcro at that spot.
Place the outer fabric and the inner fabric right sides together and stitch the 1/2" seam allowance around 3 sides. Be careful not to catch the Velcro piece in the side seam, and leave the end with the extending flap open.
Trim the corners, turn right side out and press.
Slide the cardboard into the pouch making sure the inside seam allowance stays flat and on one side of the cardboard so it doesn't bunch up.
On the open edge, fold in the seam allowance, folding the raw edge of the flap into the opening so it catches in the seam, leaving the rest of the flap extending out. Top stitch this opening closed.
Insert the eBook into the top lace loops and so the bottom of the reader is under the


bottom lace loop. Fold the lace over the bottom corners and secure the center piece of Velcro under the reader to the piece underneath. Fold over the cover and secure the Velcro flap.


Now, go read a book :)
Jane Burke, Inspirational speaker and quilter!
All I can say is "breathtaking." Yesterday morning, I went with my senior quilting buddies to see and hear a presentation by Jane Burke of Oakville, Ontario.
She presented her life story, with its ups and downs, through the story of her quilts. Wow. First she's a wonderful, warm, exuberant lady. She is so easy to listen to that 2 hours flew by. She has had several trials in her life, not the least of which is coping with her husband having Parkinson's Disease. She could have shriveled up from the world and withered away, but instead expressed the stages of her life in her art.
Born of missionary parents, and then serving herself, she has seen an amazing amount of this earth. Her spirit is amazing.
Then you see her quilts. She loves colour and it shows in her quilts. She shows the triumph and the pain in the designs. God has given her an amazing talent.
One particular quilt was "The colour wheel". Yes, it looked like a colour wheel, but as she told us about God being the potter and we are the clay, she showed us the back ground of brown tones representing the clay. Then showed how each "block" of colour was really a pitcher with handle and rounded body, with liquid showing at the brim of the complementary colour from across the wheel. She told us how it represented harmony in this world and how she thought she was feeling at the time.
But then she turned it around to show us the back. It used the same wonerful colours, but this time it was in a pattern called "Broken dishes." "This is how I really felt inside" is what she said.
Later she showed us another quilt, "The gift." She told us how it had been a block challenge - pieces of fabric in a kit with instructions to use the theme "the gift." She interpreted the gift as that which we received through Jesus.
She showed how the cross through the middle was Jesus' cross, the center trapunto "ball" was the earth. Then, if you looked close enough, you could see the shape of the Christmas tree - representing Jesus' birth a Christmas. Breathtaking. But there was more.
When she took "The Gift" and held it in front of "Broken Dishes", it fit exactly over the center, covering all the brokenness . She had not measured, nor planned it that way. But it happened. I wish I could post photos, but since I didn't ask permission, I can't. But I will say, if you ever have a chance to hear her, go. It will be a spiritual event in your life.
Sunday, November 6, 2011
New Sewing Club

Some of my son's classmates have been bugging their moms to teach them to sew. The problem is, many of the moms don't sew. Home Ec is not offered in grade school anymore (in my day it was compulsory in grades 7 and 8). 4H clubs are hard to come by too.
So I thought about starting up a sewing club. I had several "maybe" replies and three that confirmed. So we had our first 'meeting' on Saturday.
Two girls brought machines, one we couldn't get to work.
The third didn't have one, so a couple of my machines pitched in.
This way we had 1 mechanical machine with a drop in bobbin, 1 mechanical machine with a side entry bobbin (my Featherweight) and one computerized machine (my older Janome). The girls got to play with all three.
Once they could sew a straight line on lined paper, they moved up to curvy lines. Once they passed that, we went for my stash to get some fabric for tote bags. The girls were amazed at my stash!! They each got to pick out the fabric for their tote bag. I helped them cut the piece 80 cm square with scissors. Then introduced them to the rotary cutter for cutting the piece for the straps.
They folded the large square in half, right sides together and stitched around the outside 3 sides, leaving a 10 cm space at the end to turn it right side out. Once it was right side out, they stitched the opening closed and pushed one half into the other half to make the bag. Using a piece 60 cm long and 10 cm wide, I had them press it in half lengthwise, then fold each half in again so it ended up four thicknesses with the raw edges inside. They topstitched this length on both sides and then cut it in half to make two straps. They sewed the straps onto the top of the bag and then folded them into the upright position and topstitched around the whole top of the bag. That's it. The bags were done, we were on time (2 hours) and the girls were ecstatic at what they had made. We all had a lot of fun, and I think we've started 3 girls onto the great hobby of sewing!
Tuesday, November 1, 2011
Checkbook wallet and PINK Bobbins!
Yeah! More playing with fabric. In this case (and the 
coupon wallet) I'm playing with Jay McColl's line called "Habitat" combined with some Kona solids.
I used a similar technique to the coupon wallet but started first with stitching the accent stripe of Habitat to the orange outer fabric.
Then I made a pocket in the front center section to hold a checkbook.
 Then added a little flap because I use duplicate checks, so this prevents the copy of one imprinting the next copy. It's just two layers of fabric fused together and cut to size. No special finishing needed to the raw edges because the 'glue' also prevents fraying.
 I added a zipper to two of the inner flaps to make it a coin purse. This involved a bit of creativity to get it in place, but it finally worked.

The last fold is a pocket for bills. You know, the $50's and $100's that never come to visit me. :)

 And finally = the front and back views. Now I'll have no problem finding my checkbook in my purse.
 When I was in my local Janome dealer today, they had these cute little boxes of pink bobbins. I don't know if they're a pink product for breast cancer awareness or not, but they had to come home with me. Now I'll be able to tell my 'good' bobbins from the cheapos that also inhabit my space.
That's it for now. Got to go bug my DS to get his homework done.

coupon wallet) I'm playing with Jay McColl's line called "Habitat" combined with some Kona solids.
I used a similar technique to the coupon wallet but started
 first with stitching the accent stripe of Habitat to the orange outer fabric.
Then I made a pocket in the front center section to hold a checkbook.
 Then added a little flap because I use duplicate checks, so this prevents the copy of one imprinting the next copy. It's just two layers of fabric fused together and cut to size. No special finishing needed to the raw edges because the 'glue' also prevents fraying.
 I added a zipper to two of the inner flaps to make it a coin purse. This involved a bit of creativity to get it in place, but it finally worked.
The last fold is a pocket for bills. You know, the $50's and $100's that never come to visit me. :)

 And finally = the front and back views. Now I'll have no problem finding my checkbook in my purse.
 When I was in my local Janome dealer today, they had these cute little boxes of pink bobbins. I don't know if they're a pink product for breast cancer awareness or not, but they had to come home with me. Now I'll be able to tell my 'good' bobbins from the cheapos that also inhabit my space.
That's it for now. Got to go bug my DS to get his homework done.
Monday, October 31, 2011
Coupon Wallet tutorial, and urgh - blogger issues.
I've been trying for two days to post a tutorial for a coupon wallet. Blogger wouldn't let me post more than 3 photos, and it's a photo-laden tutorial.. Urgh!
So, for now, I finally tamed the monster. For those of you who can follow instructions without the aid of photos, this would be no problem. (I don't qualify there!) For those of us who need visual aids, here goes!

So, for now, I finally tamed the monster. For those of you who can follow instructions without the aid of photos, this would be no problem. (I don't qualify there!) For those of us who need visual aids, here goes!

Coupon Wallet
A fat quarter or two fat eighths, minimum Cut 2 pieces – one 18” X 9” (Outside fabric)
One 21” X 9” (Inside fabric)
Fusible interfacing - cut one 18”X 8” light to med weight
Heat N Bond - cut three 3” X 8” and one 2” X 8” and one 5 ½”X 8”
1” piece of velcro – both parts.
Instructions Read all instructions before starting.
Fuse large interfacing piece to wrong side of outside fabric , place 2” strip of fusible on top of the interfacing and two inches in from the left edge. Fuse in place fuse 2”X8”
Place 5 ½” piece of fusible on top of the interfacing along the right edge, line it up right at the right edge.
The interfacing and fusible will be ½” narrower than the outside fabric – this is for seam allowance.

Fold the inside fabric, wrong sides together and press along the fold.
Fold each side , accordion style so it makes a folded piece with three panels and two “pockets”
/\_/\_/\ Press well, then open and lay wrong side up.
Fuse the three 3” pieces of fusible to every other section of the wrong side of the fabric making sure the edge of the fusible is right along the folded line.


Refold the fabric, one section at a time and fuse each one. You should now have three vertical pieces joined at the bottom with a fold. Set aside.
Take your outside fabric and fold the 2” left edge over the fusible and fuse in place. Take care that it completely covers the 2” fusible piece.Mark the outside edge center and sew the loop (scratchy side) square of velcro on the outside of the bonded area – right along the edge.
Fold the right edge over 5 ½” and finger press - DO NOT FUSE YET. Open and turn right side up.
Mark the spot for the soft spot of velcro right along the fold on the 5 ½” side. It should be on the 5 ½” side of the fold. Sew in place.
Fold the right side , right sides together along the previous fold line.
 Mark the two outer corners along the fold line down to an inch down on the sides with a straight line or curve - whatever shape you want the front flap corners to be. Stitch along your markings from the fold towards the cut edge but stop your stitching at the edge of the interfacing. Do not go onto the seam allowance. Trim the seam allowance = only along where you stitched.

Turn this flap right side out and push out the corners, trimming where necessary.
Place outside fabric right side up. Fold the loose part of the flap up and pin out of the way.

Open the folded inside piece of fabric so one side has 2 flaps and the other 1 flap. Place it right side down onto the right side of the outer fabric so that the 2 folds line up along the 2” folded edge and the 1 flap lines up along where you folded the outer flap up.
Carefully stitch a ½” seam on the folded inner fabric from the spot where the top flap is folded, down to the folded edge where the 2 flaps and the outer folded edge meet. Grade the seams.


Take the upper flap part and fold the seam allowances to the inside. You may trim the excess seam allowance at an angle but do not go within an inch of the place where you stitched. Tuck the loose end of the flap inside the wallet between the first flap and the wrong side of the back of the wallet.


The soft piece of velcro should be on the inner edge of the flap. Fuse the top flap together, taking care along the velcro so it doesn’t wrinkle.
Topstitch from one bottom corner (through all layers), along the edge of the top flap and down the other side (through all the layers.)

Fold top flap down and secure the velcro.
You have your wallet!
Yeah, this finally worked.
Subscribe to:
Posts (Atom)